Create a free Supabase account at supabase.com.
Step 1: Create a Supabase project
Create a new Supabase project. Then, copy the Supabase URL, anon public key and service role key and add it as environment variables for your application. These values can be found on the API settings page of your Supabase project (https://app.supabase.io/project/{project_id}/settings/api).
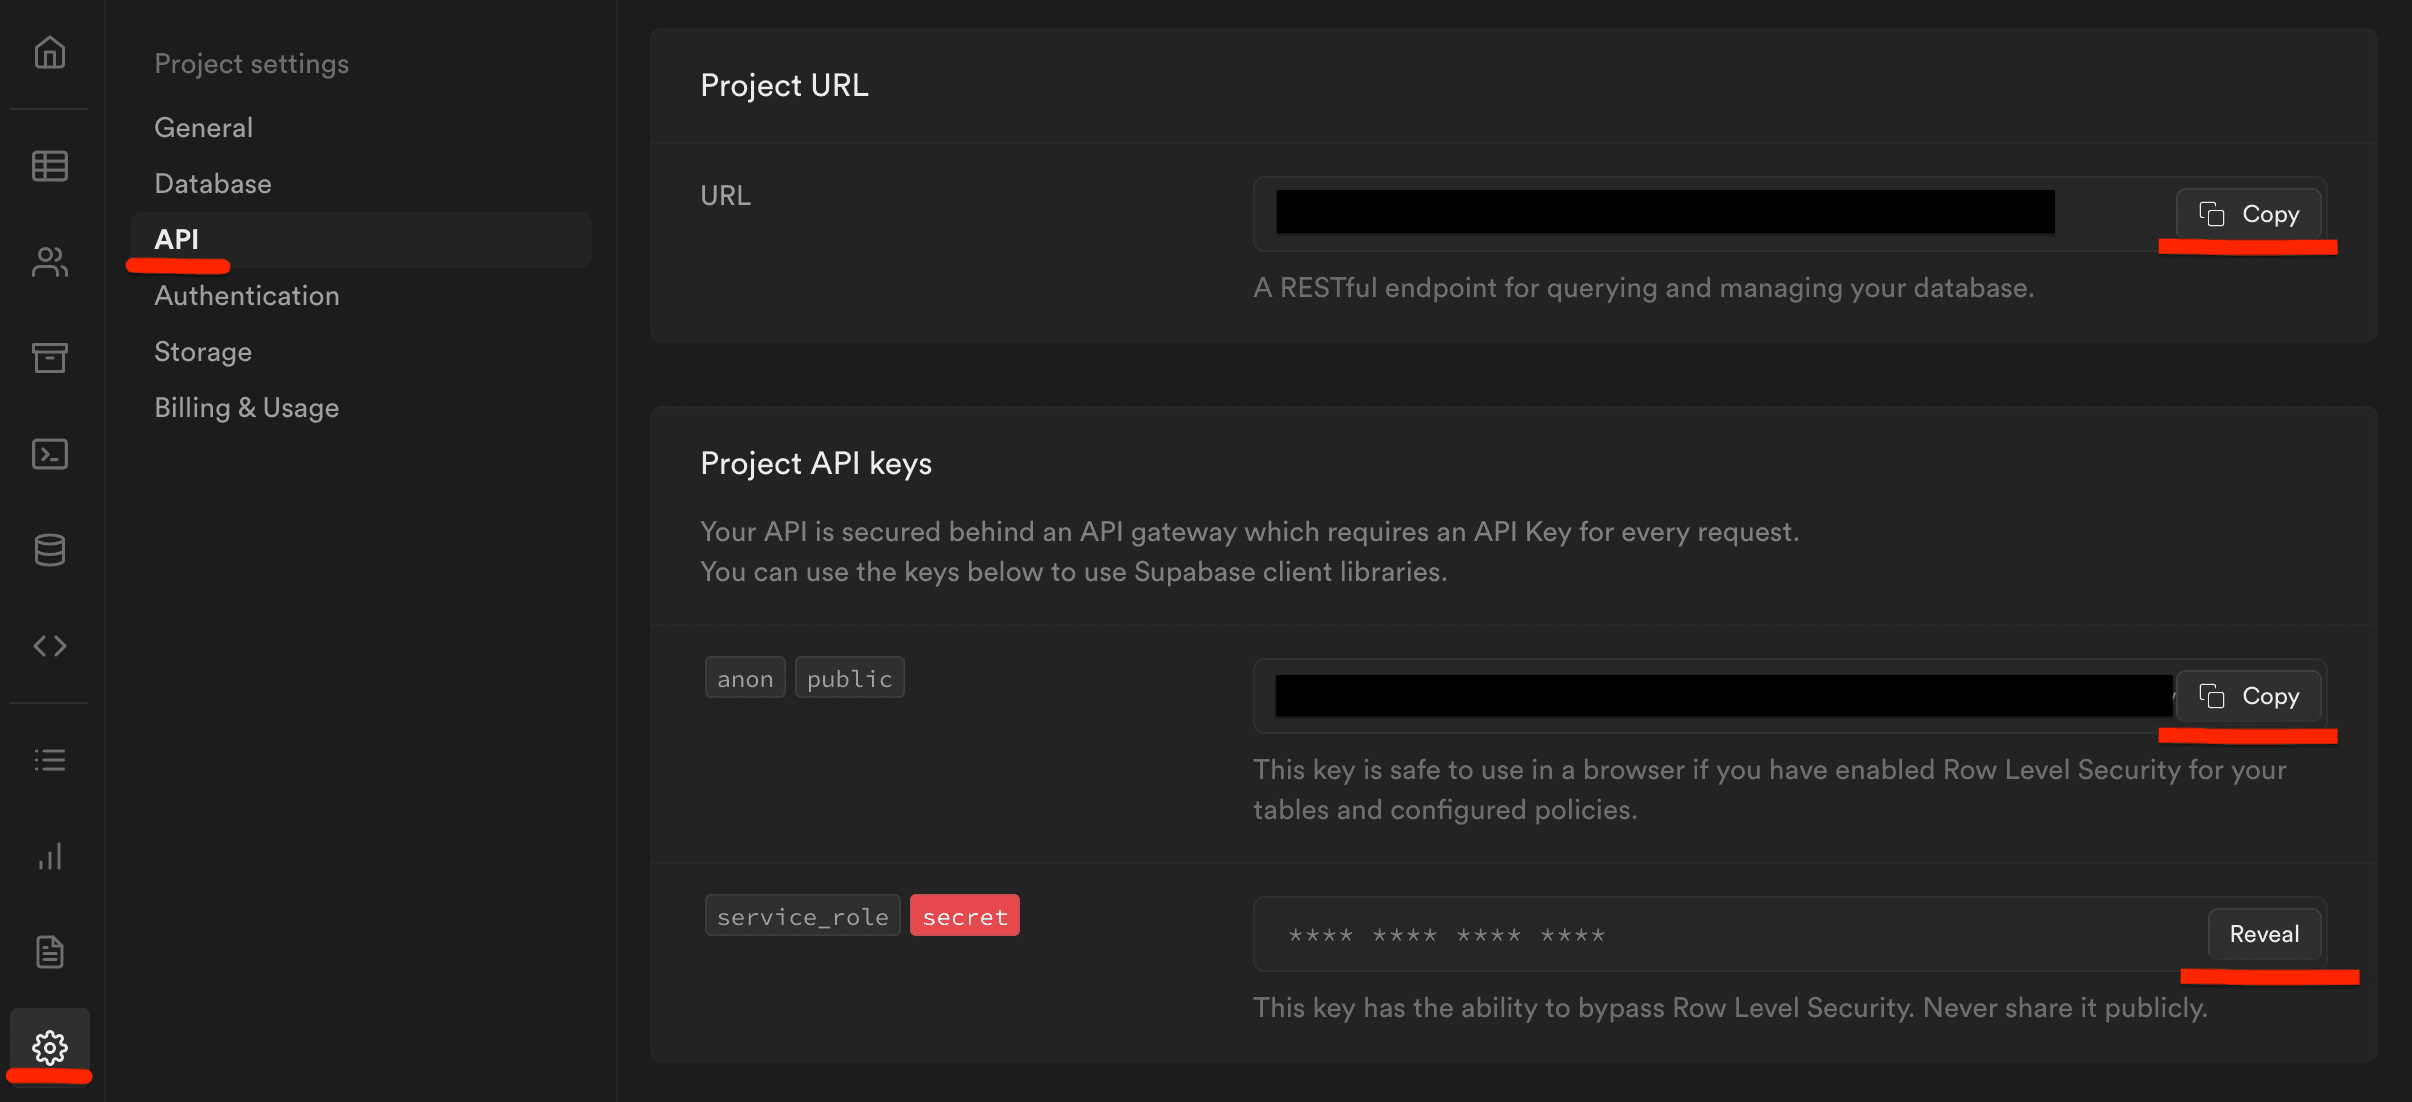
The environment variables are named:
NEXT_PUBLIC_SUPABASE_URLNEXT_PUBLIC_SUPABASE_ANON_KEYSUPABASE_SERVICE_ROLE_KEY
To configure environment variables locally for this project rename the .env.example file in the root directory to .env.local and modify the values in the file.
Step 2: Create Supabase database tables and storage bucket
In the src/sql folder you will find a quick_start.sql script. Run this script on your Supabase database to create the required tables, storage buckets and policies. To run this script go to the SQL editor page (https://app.supabase.io/project/{project_id}/editor/sql) of your Supabase project.
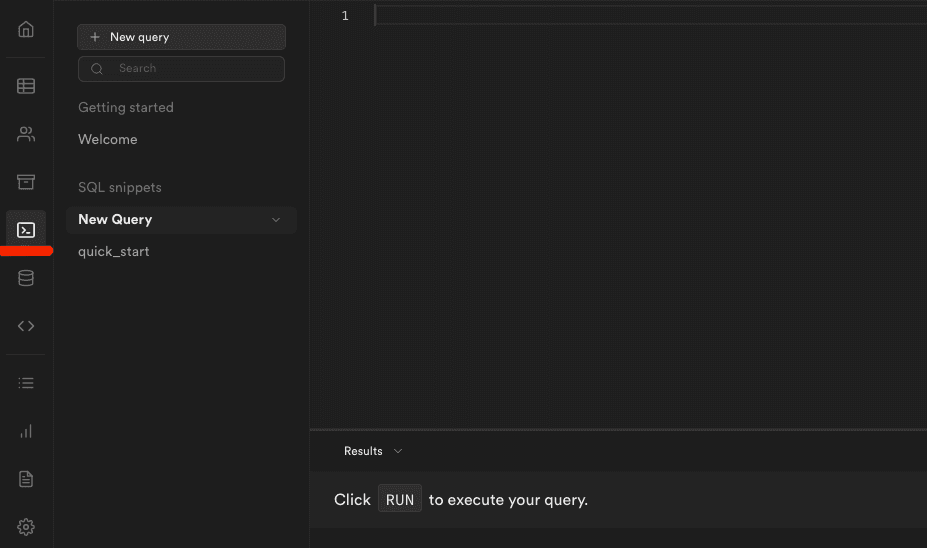
You will also find SQL scripts numbered from 1 - 6 in the src/sql folder. These are the individual scripts to create each table or storage bucket. The quick_start.sql script consists of all these scripts combined. If you want to modify the schema for any table, it's easier to use the individual scripts to do so.
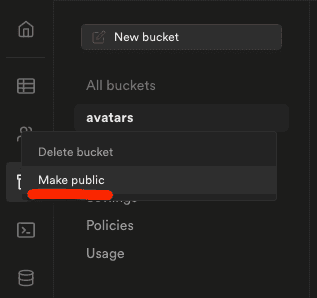
After you created the "avatars" storage bucket (using the quick_start.sql script) you should change the bucket's access to public. This can be done by navigating to the storage buckets page (https://app.supabase.io/project/{project_id}/storage/buckets), clicking on the options menu for the bucket, and then clicking "Make public".
You can read more about Supabase in the official Supabase docs.
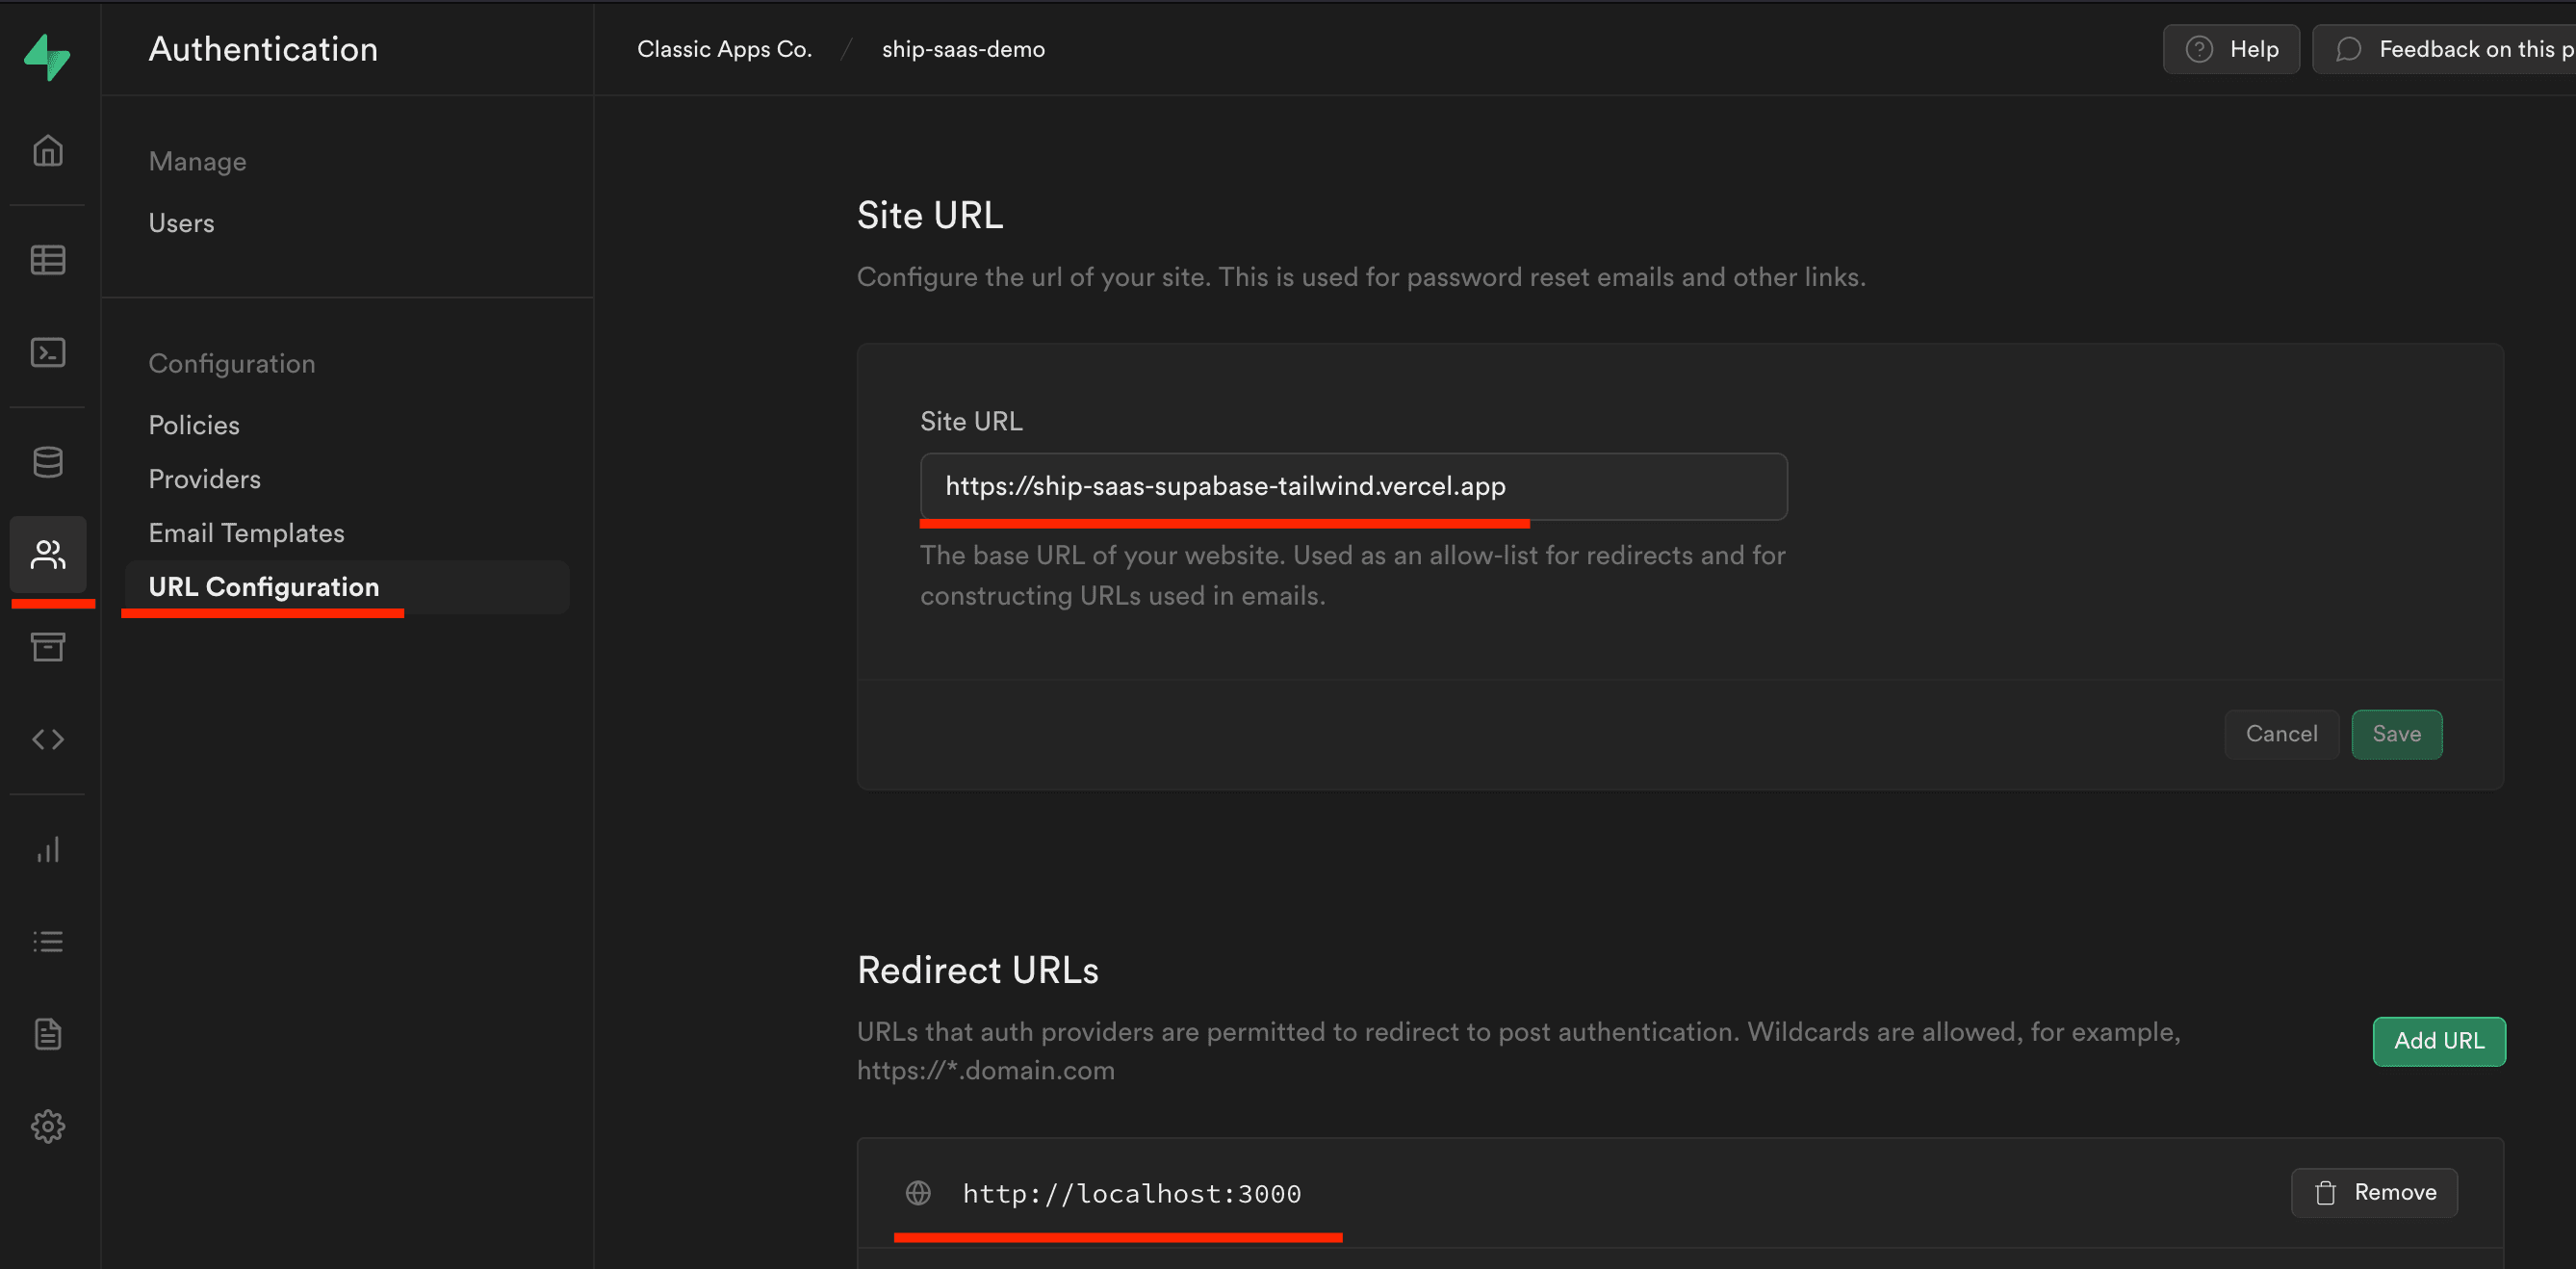
Step 3: Configure Supabase authentication URLs
Navigate to the URL Configuration section on the Authentication page in your Supabase project settings (https://app.supabase.com/project/{project-id}/auth/url-configuration).
Add your application URL in the "Site URL" field and add all other URLs that you might redirect to in your application under the "Redirect URLs" section. This will allow you to use the authentication features of Supabase both locally and in production.