- Published on
- Published:
- Reading time
- 4 min read
How to deploy a Next.js app on Vercel
- Authors

- Name
- Nico Botha
- @nwbotha
What is Vercel?
Vercel is a serverless hosting platform built to host front-end applications. It has a great user experience and allows developers to completely offload all DevOps related tasks to the platform. With Vercel your hosting setup is a breeze. And you'll never have to worry about scalability or reliability issues, because Vercel takes care of it all.
What is Next.js?
Next.js is an open source React framework that makes statically and server-side rendered pages possible in your app. Where traditional React apps are rendered entirely in the browser, Next.js makes it possible to render pages server-side. This improves page speed and reduces bundle size significantly. You can read more about this powerful framework here.
How to set up a Next.js app on Vercel
Step 1: Create a Next.js application
First, create a basic Next.js application by running this command:
npx create-next-app
Then, push the repository to a cloud git provider. GitHub or GitLab works best for integration with Vercel.
Step 2: Create a Vercel account
Once your code is pushed to a remote repository, go to Vercel. Vercel supports logins with different cloud git providers. Sign in with the cloud provider that you selected to host your code (i.e. GitHub, GitLab). If you don't have any applications hosted on Vercel you will see an empty dashboard where you can import your project.
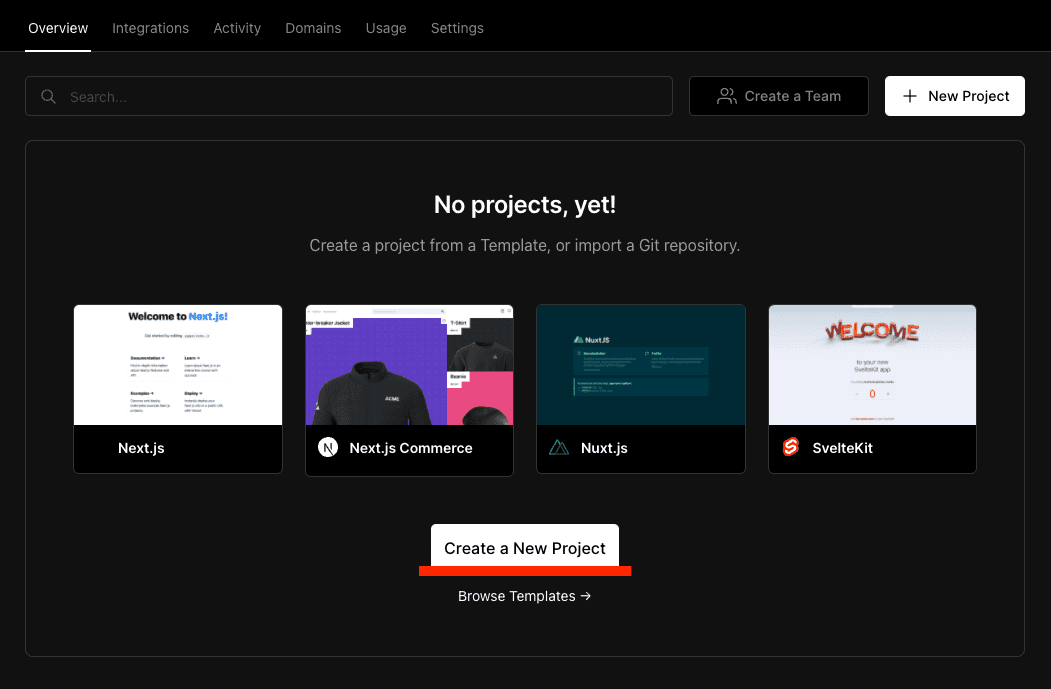
Step 3: Import repository to Vercel
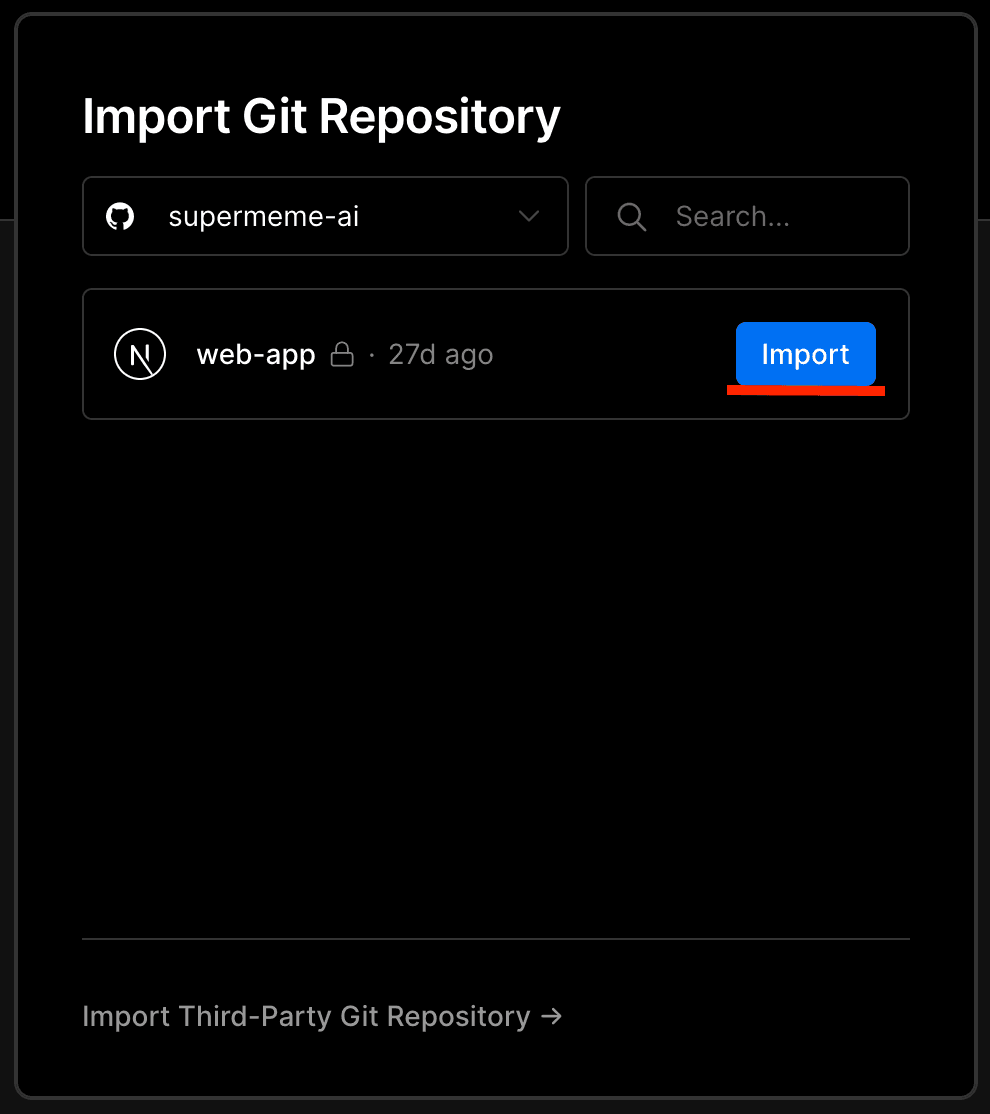
Click on the "Create a New Project" button (shown above) to start with setting up your application. You will then see a list of your repositories that can be imported to Vercel.
If you don't see a list of repositories you first need to authorize Vercel to access your repos.
Click on the blue "Import" button next to the repository to start importing it to Vercel.
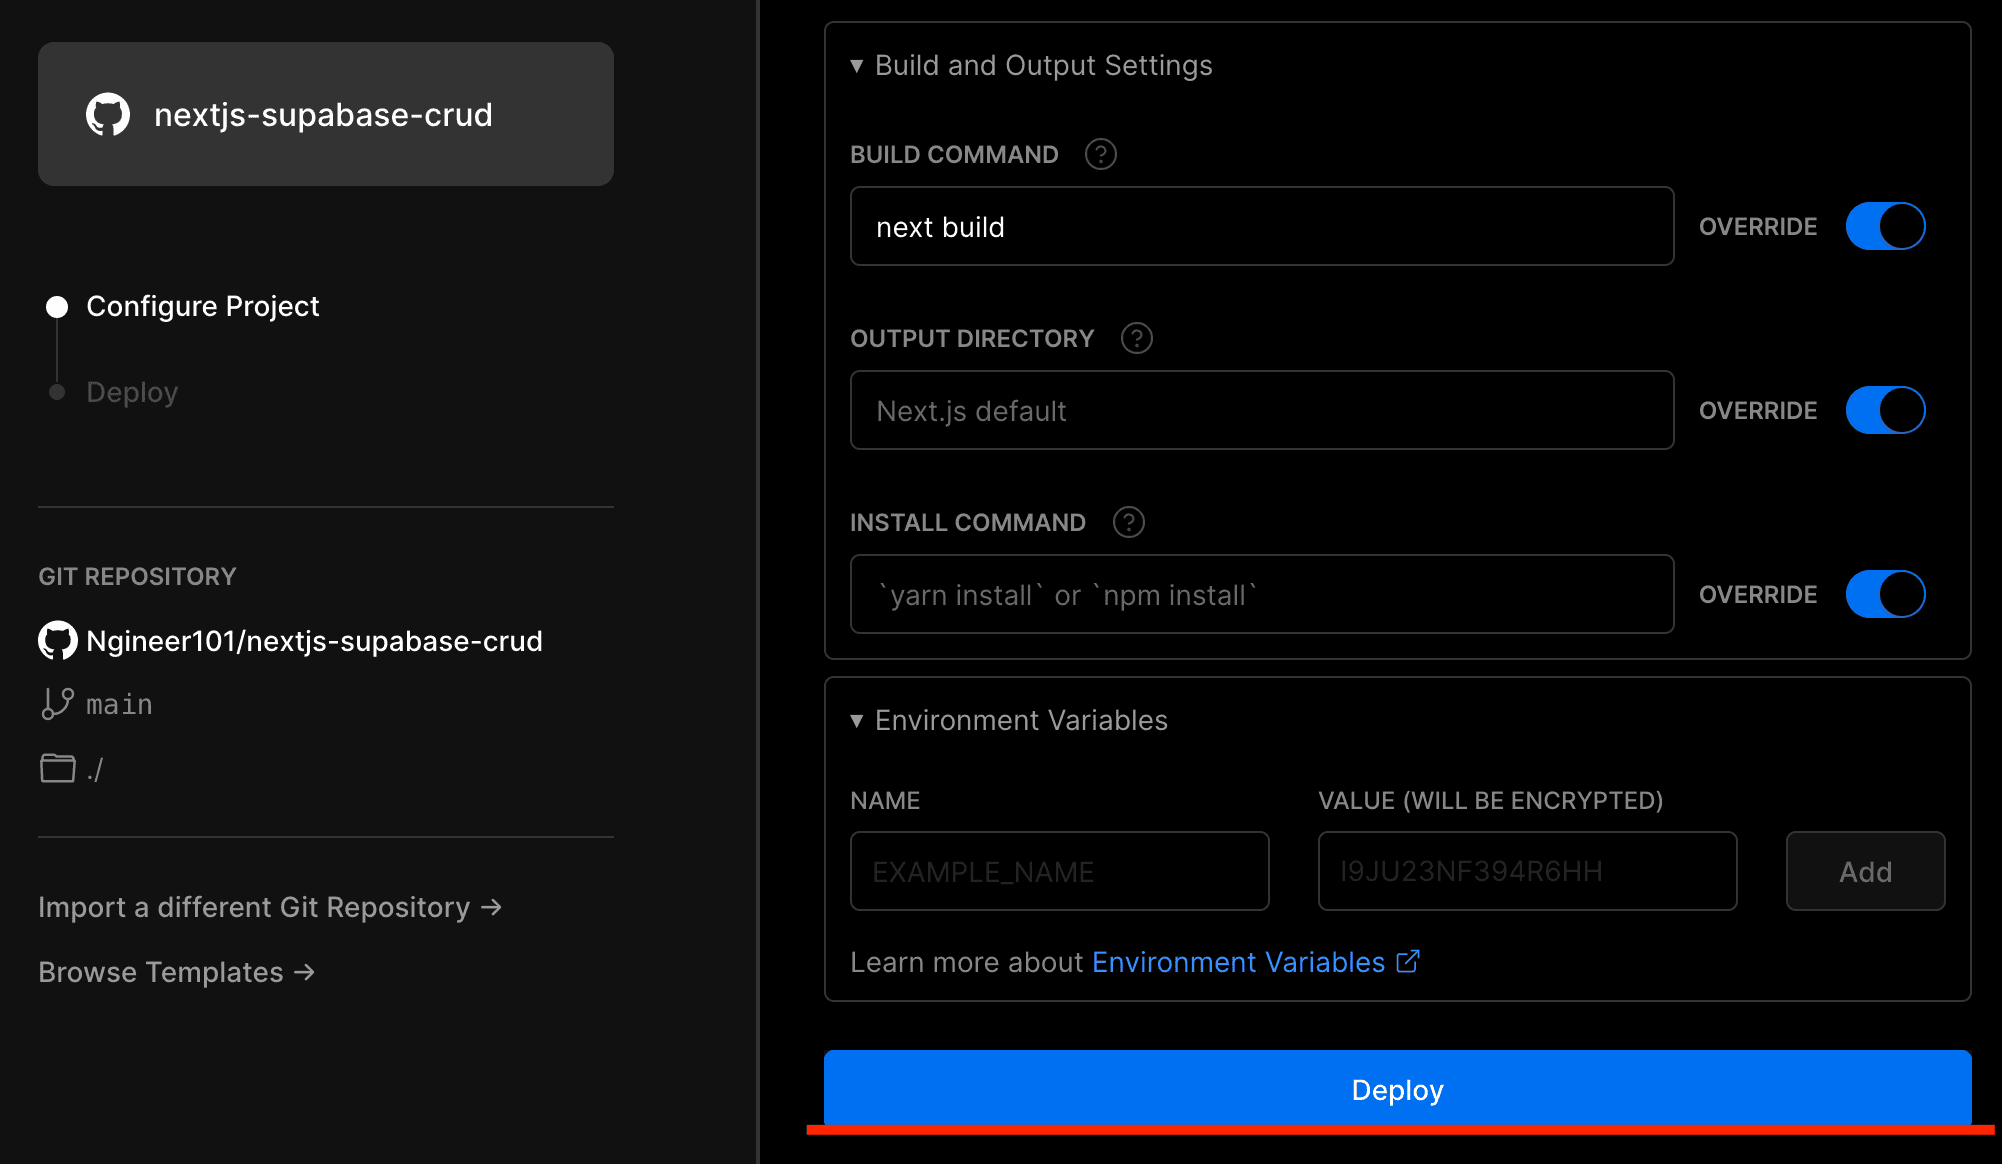
Step 4: Configure your project
After clicking "Import" you will be navigated to the project configuration page. On this page you can configure various settings for your project such as project name, JavaScript framework, and custom build commands. These settings are automatically detected by Vercel, but you have the option to change it according to your preference.

You are also able to configure environment variables for your project. These values are automatically encrypted by Vercel for safe storage. After you configured your project settings and environment variables you can click the blue "Deploy" button at the bottom of the page. This will start the deployment of your application.
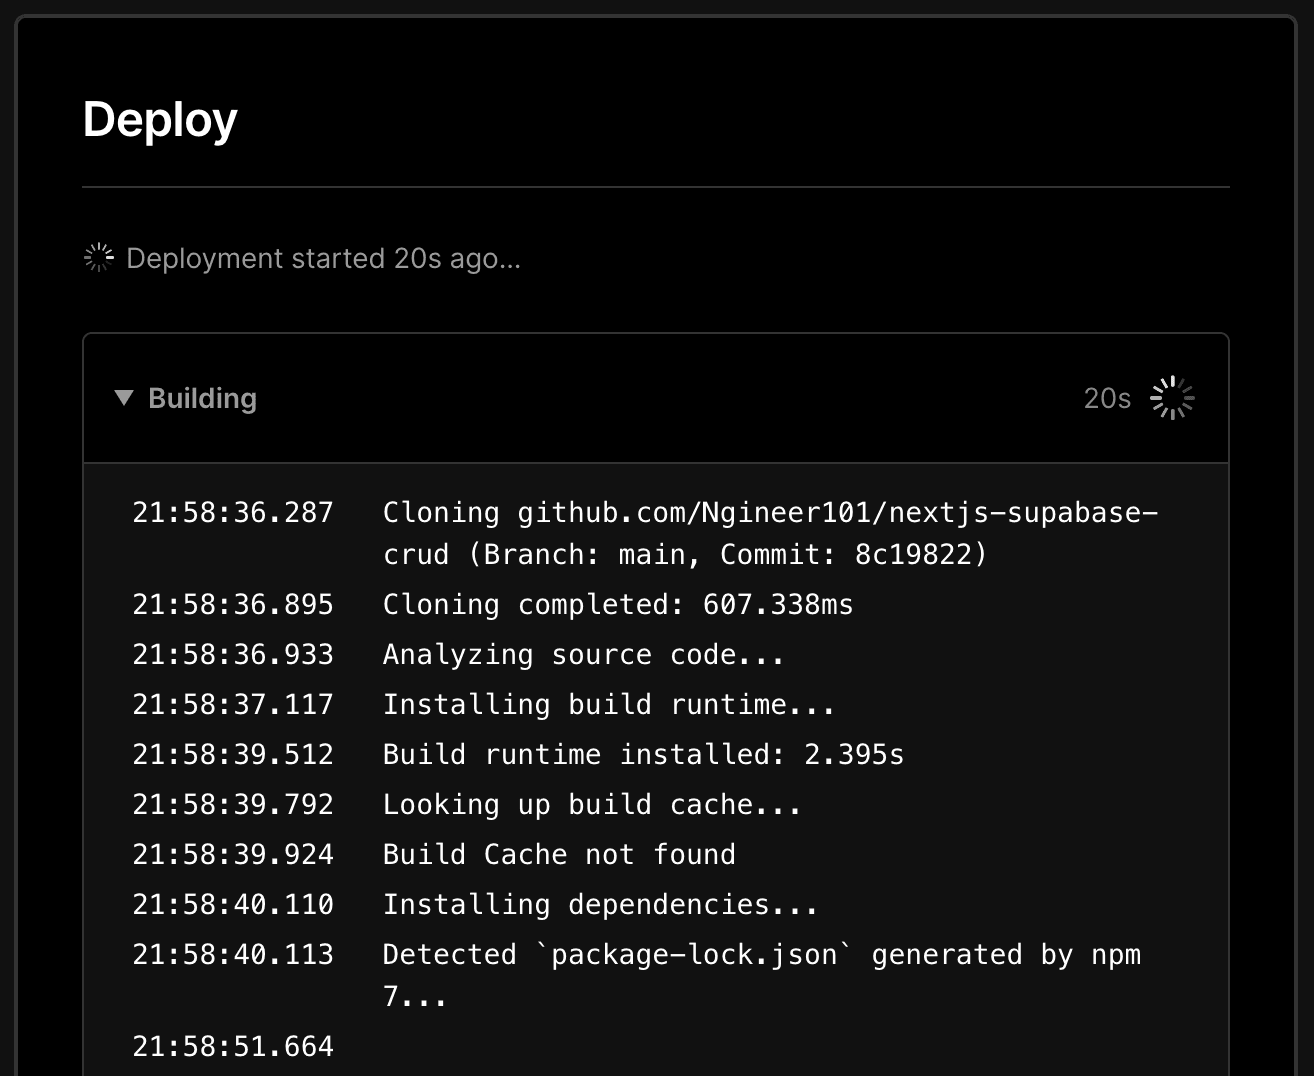
Once the deployment has started you will see the build logs being printed on the screen. If there is an issue with your project you will see the error in the logs, otherwise you will see that your project was successfully deployed.
If your deployment was successful you will see a screenshot of your app and you will be able to navigate to the app's Vercel dashboard. Once your deployment is successfully set up, new deployments will be triggered every time you push to the main/master branch or create a PR to that branch.
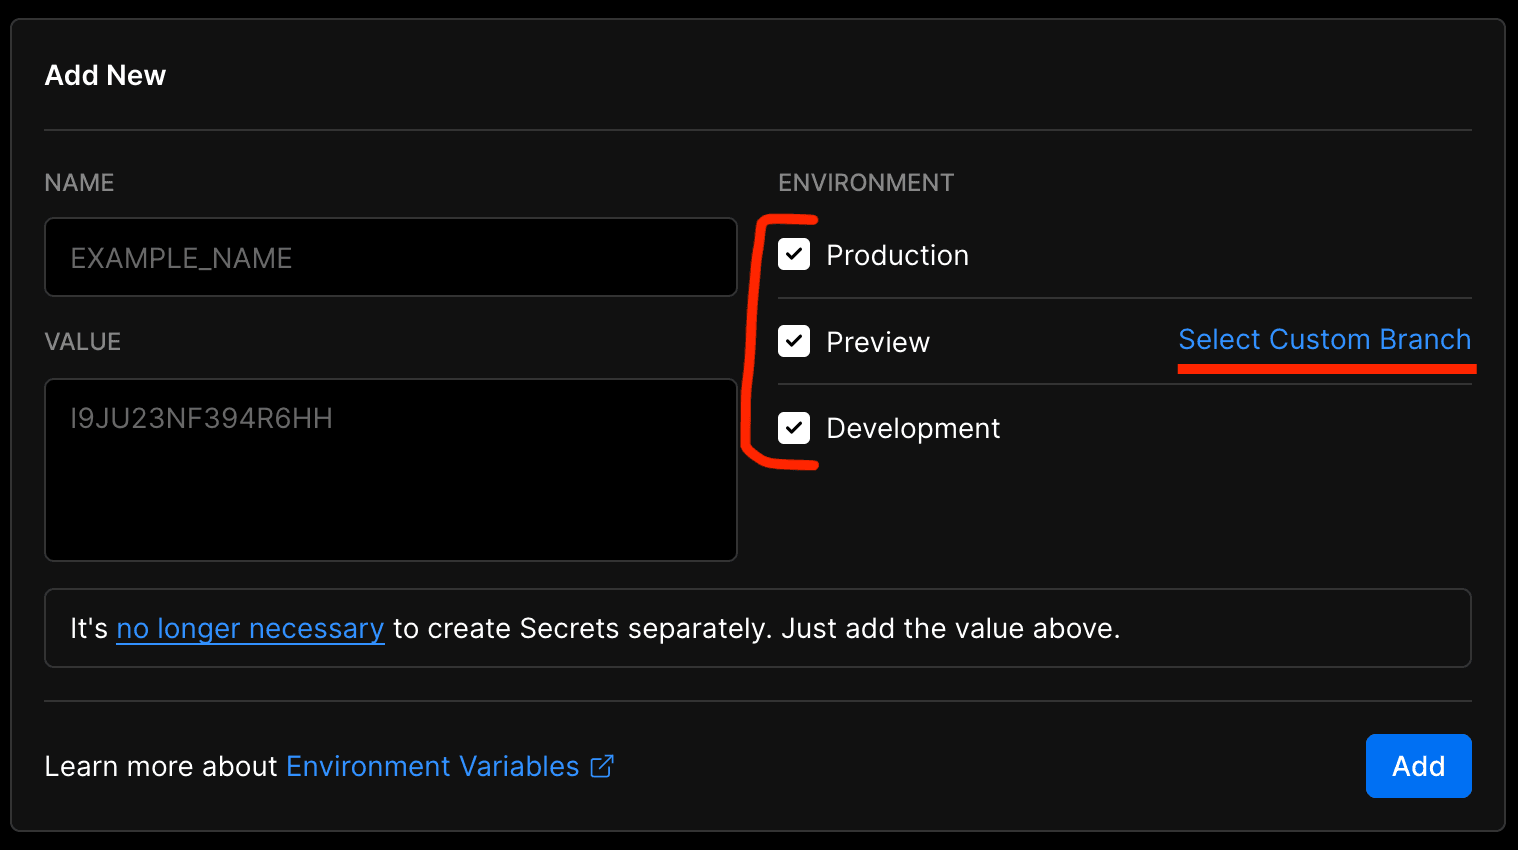
Configuring environment variables for different environments
After the initial setup, your environment variables will be the same for the production, development, and preview environments. To configure different values for different environments, navigate to the "Environment Variables" page of your application (i.e. https://vercel.com/{username}/{project-name}/settings/environment-variables).
Here you will be able to select which variable should be available for a specific environment. It is also possible to configure a specific branch as a preview environment. All commits to these branches are automatically deployed by Vercel.
It's as easy as that. Vercel takes care of all the deployments, scaling, and hosting from now on. You can just focus on building your app.