- Published on
- Published:
- Reading time
- 4 min read
How to deploy a Next.js app on Heroku
- Authors

- Name
- Nico Botha
- @nwbotha
What is Heroku?
Heroku is a platform-as-a-service (PaaS), offering various services that can be used to host a wide range of applications and data stores. From PostgreSQL databases to containerized applications and Redis caching, you can host it all on this easy to use platform. Most popular frameworks and languages are supported out of the box.
What is Next.js?
Next.js is an open source React framework that makes statically and server-side rendered pages possible in your app. Where traditional React apps are rendered entirely in the browser, Next.js makes it possible to render pages server-side. This improves page speed and reduces bundle size significantly. You can read more about this powerful framework here.
How to set up a Next.js app on Heroku
Step 1: Create a Next.js application
First, create a basic Next.js application by running this command:
npx create-next-app
Then, push the repository to a cloud git provider. GitHub works best for integration with Heroku.
Step 2: Create a Heroku account
Once your code is pushed to a remote repository, go to the Heroku signup page. Enter all the required details to create an account. If you already have an account you can just sign in.
Once you are signed in, you will see your empty application dashboard:

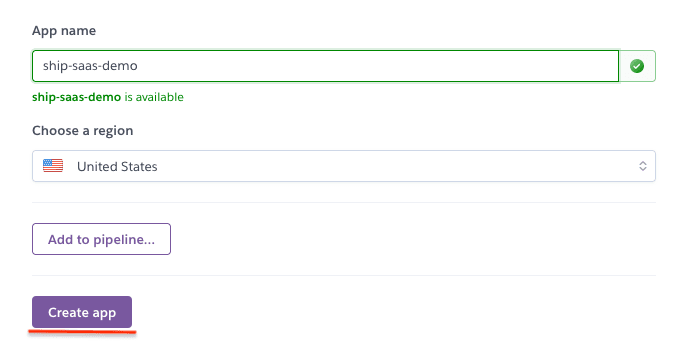
Step 3: Create your application
On your empty dashboard, click the "Create new app" button. You will then see a screen where you can enter your application name and choose a region where your app should be hosted. Enter your app name (as below) and choose the desired region for your application. Then click the "Create app" button to create your application.
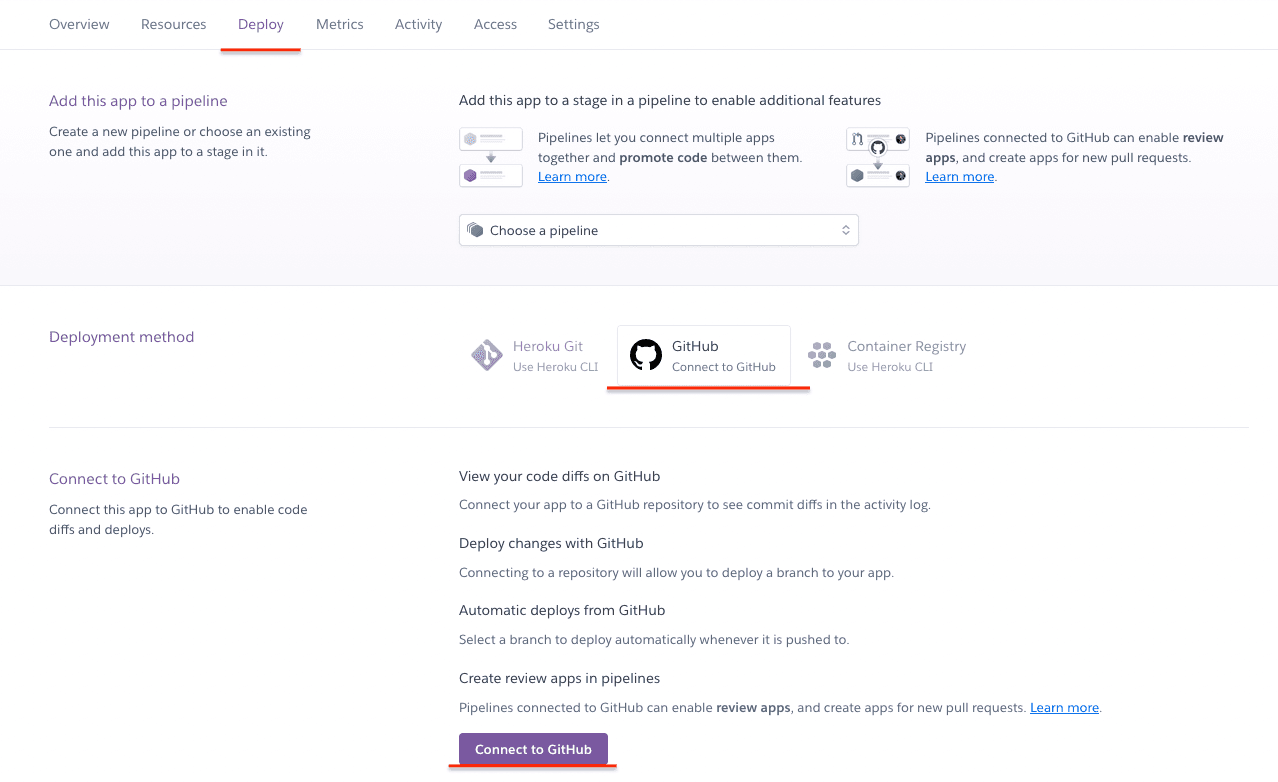
Step 4: Connect your GitHub account to Heroku
Once you created your application, you will be navigated to the deployment page of your app. Choose the "Connect to GitHub" option and click the purple "Connect to GitHub" button at the bottom of the page.
A GitHub authorization window will pop up asking you to approve the authorization request. After you connected your GitHub account to Heroku you'll be able to search for the repository that you want to deploy. Once you found the repository that you want to deploy, click the "Connect" button next to it.

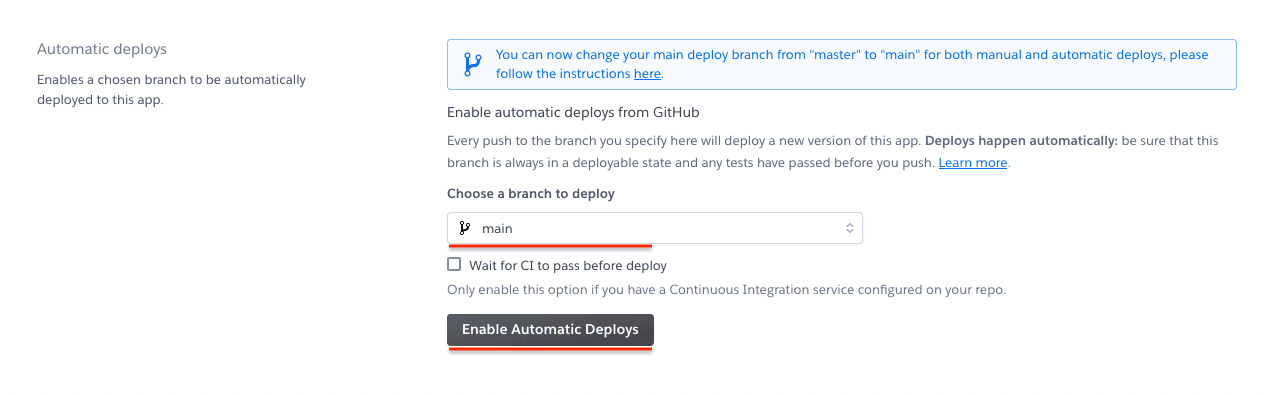
Optional step: Enable automatic deployments
After you have connected your GitHub repository you have the option to enable automatic deployments for a specific branch. This is handy if, for instance, you want to automatically deploy any changes to your dev or staging environment. If you want to enable automatic deployments, select the branch for which you want to enable it and click the "Enable Automatic Deploys" button. Any new commit to the branch will automatically trigger a new deployment.
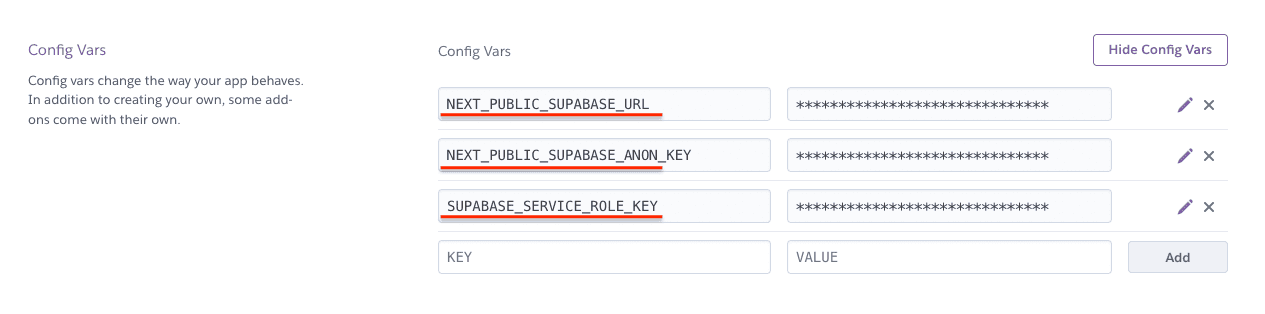
Step 5: Add configuration variables for your app
Navigate to the settings tab of your Heroku application and click the "Reveal Config Vars" button.
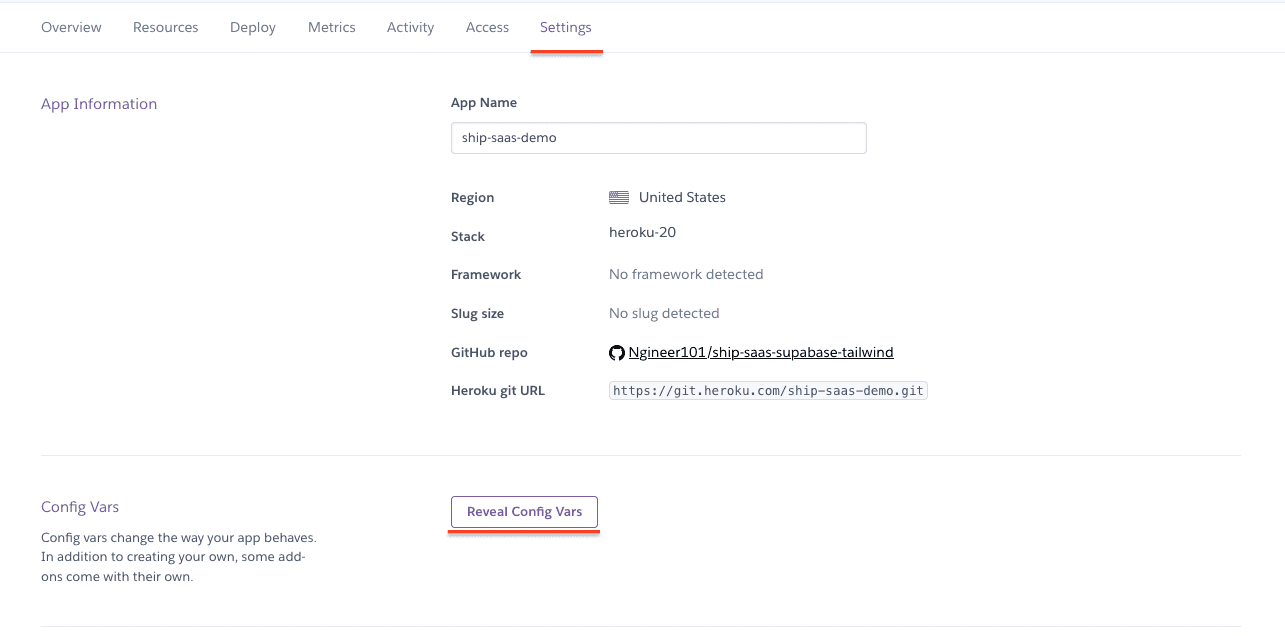
You'll then be able to see all the configuration variables (if any) for your app. Add all the required configuration variables here.
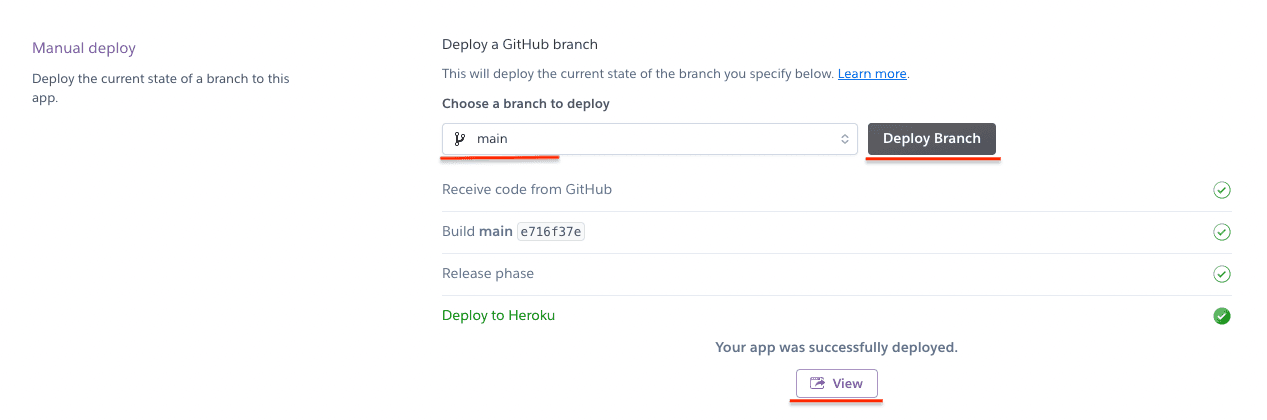
Step 6: Trigger your first deployment
Navigate back to the "Deploy" tab of your application and scroll to the "Manual deploy" section (at the bottom of the page). Choose the branch that you want to deploy and click the "Deploy Branch" button.

Once the deployment has started you'll be able to see the build logs in the console window underneath. If the deployment has completed successfully you'll see a message stating that "your app was successfully deployed.". Click the "View" button to view your deployed application.
That's it - a quick deployment setup for a Next.js app on Heroku. If you enabled automatic deployments, a new deployment will automatically be triggered for every commit to that specific branch. If you prefer to do manual deployments you can trigger a deployment as explained in Step 6.