- Published on
- Published:
- Reading time
- 4 min read
How to deploy a Next.js app on AWS Amplify
- Authors

- Name
- Nico Botha
- @nwbotha
What is AWS Amplify?
AWS Amplify is a set of tools and services that can be used to build full-stack serverless applications. It provides a powerful set of features for web and mobile applications such as authentication, storage, analytics, and hosting. AWS Amplify also allows developers to build highly performant and scalable applications with an incredibly easy setup and configuration.
What is Next.js?
Next.js is a JavaScript framework for building server-side-rendered React applications. With a powerful set of features for web and mobile applications such as automatic code splitting, server-side rendering, and static site generation, Next.js allows developers to build highly performant and scalable applications with minimal setup and configuration. With an unmatched development experience, it helps developers easily build, test, and deploy their applications in no time.
How to deploy a Next.js app on AWS Amplify
Step 1: Create a Next.js app
To create a Next.js app, run the following command:
npx create-next-app my-app
Then, push the repository to a Git provider such as GitHub or GitLab. AWS Amplify supports GitHub, GitLab, Bitbucket, and AWS CodeCommit.
Step 2: Create an AWS account
Navigate to AWS and create an account. You will need to provide your credit card information to create an account. AWS offers a generous free tier for the first 12 months.
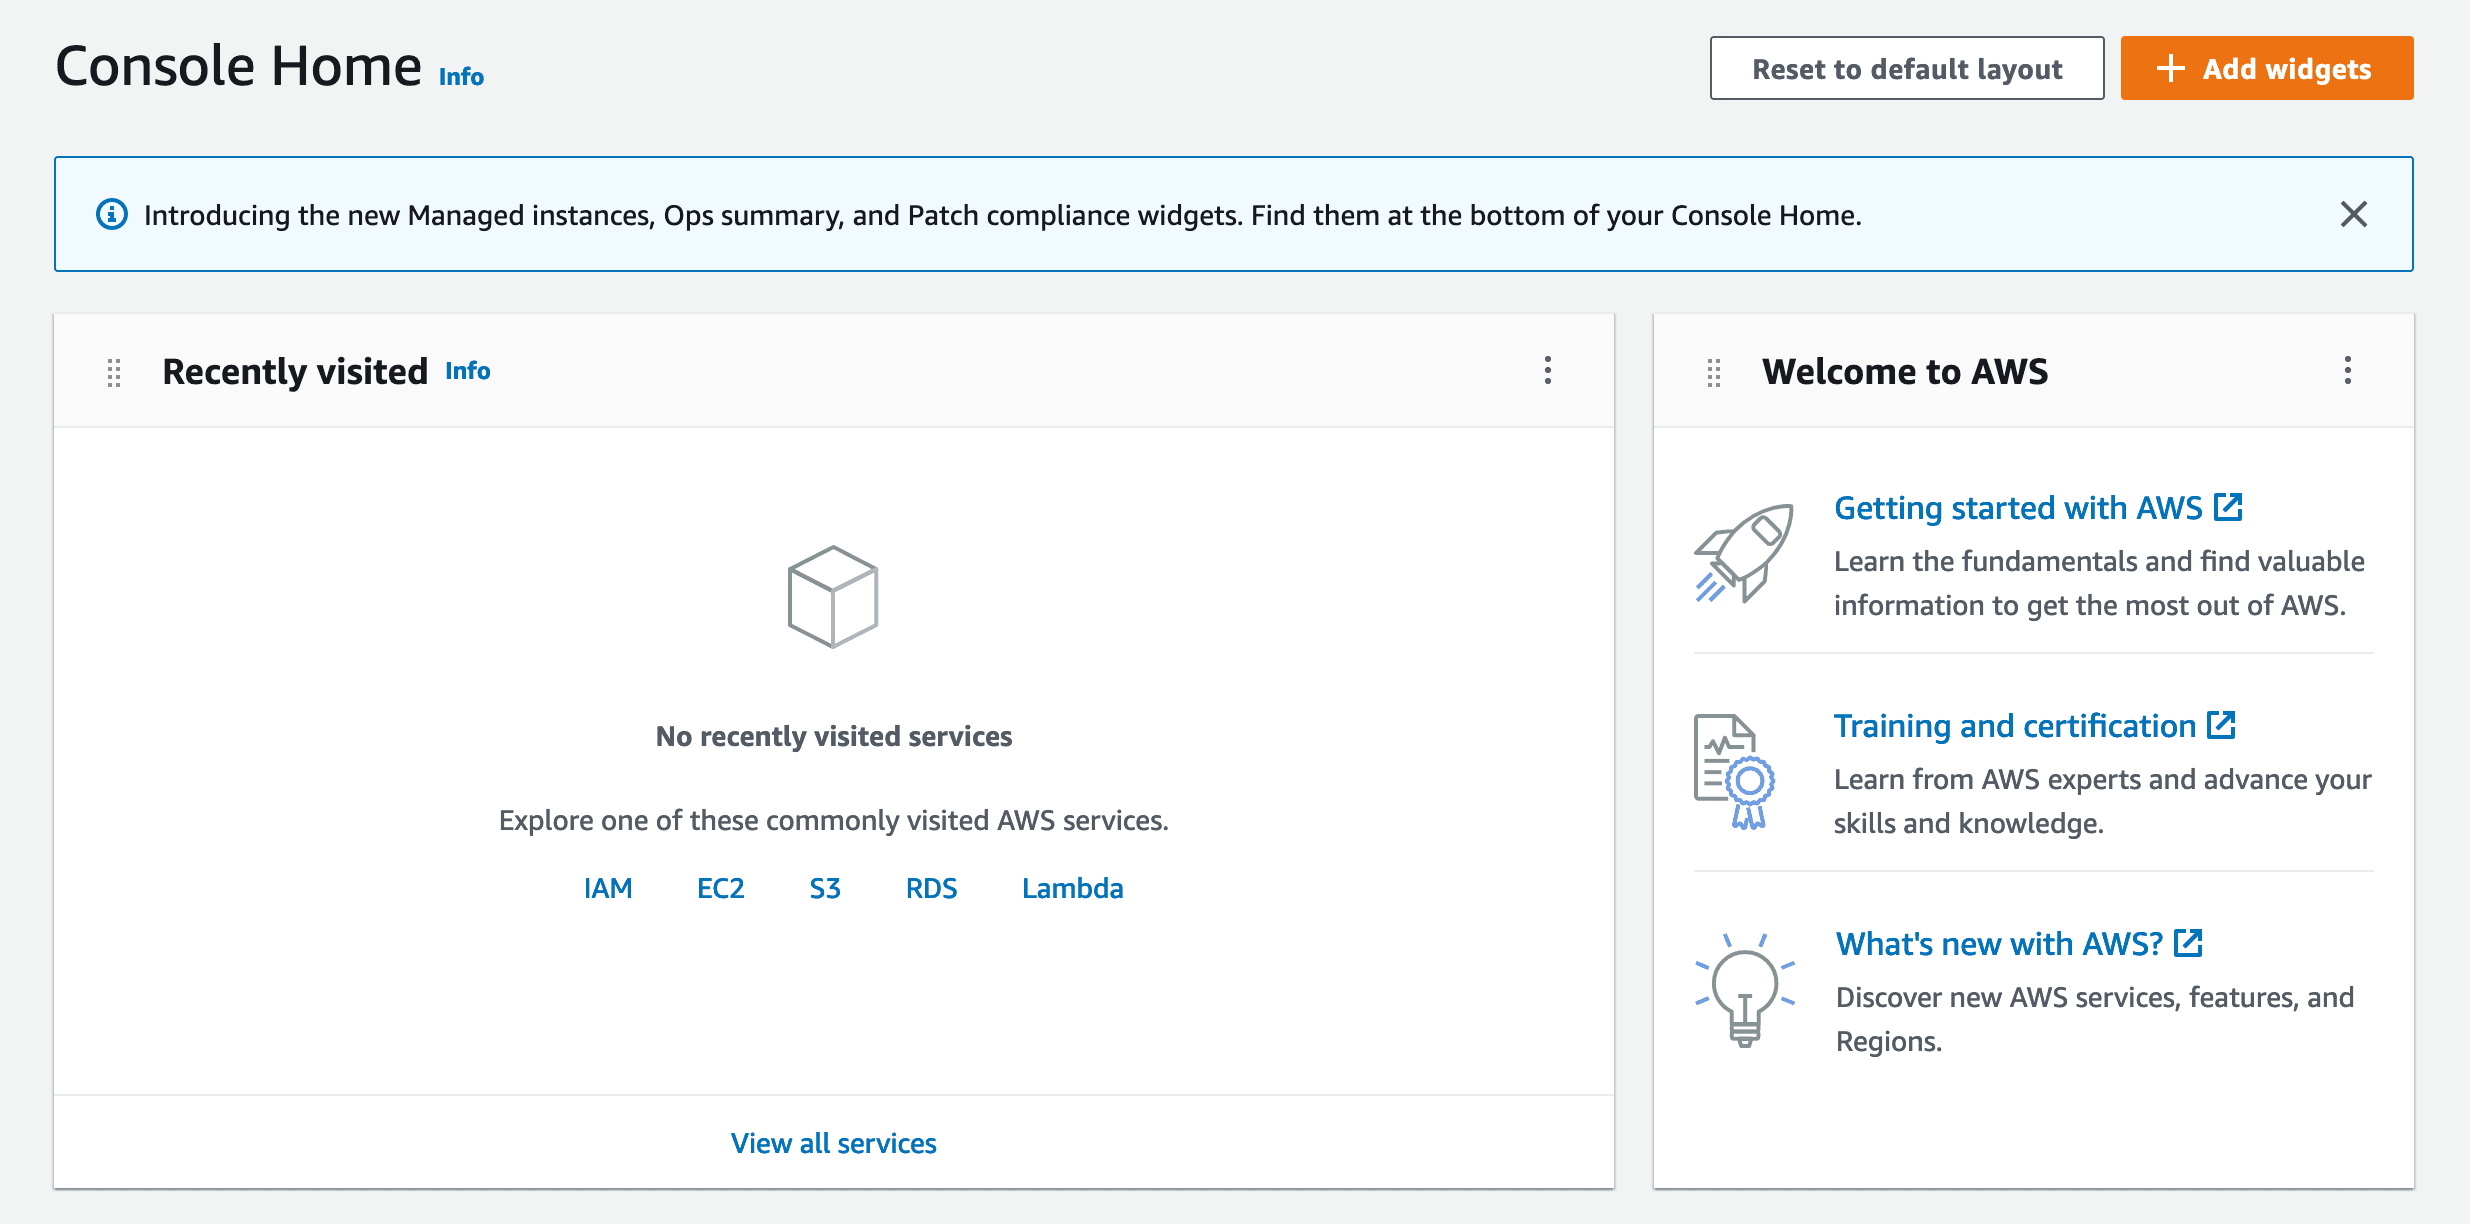
Once you have created an account, you will be able to access your AWS management console.
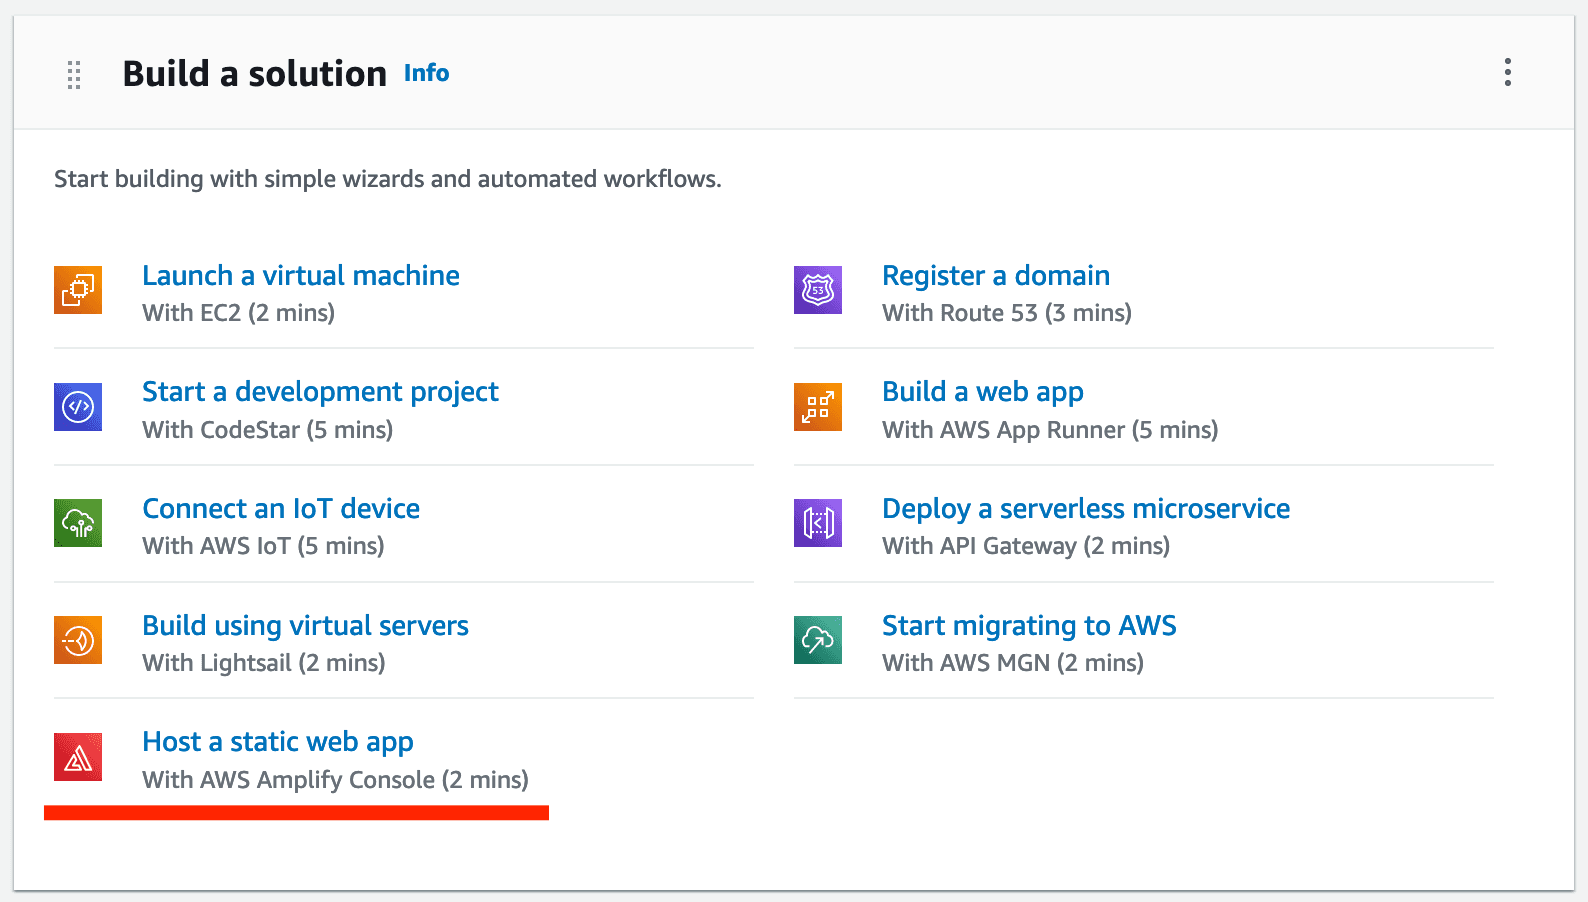
Step 3: Create an AWS Amplify app
On your AWS management console, scroll down to the "Build a solution" section and click on the "Host a static web app" link.
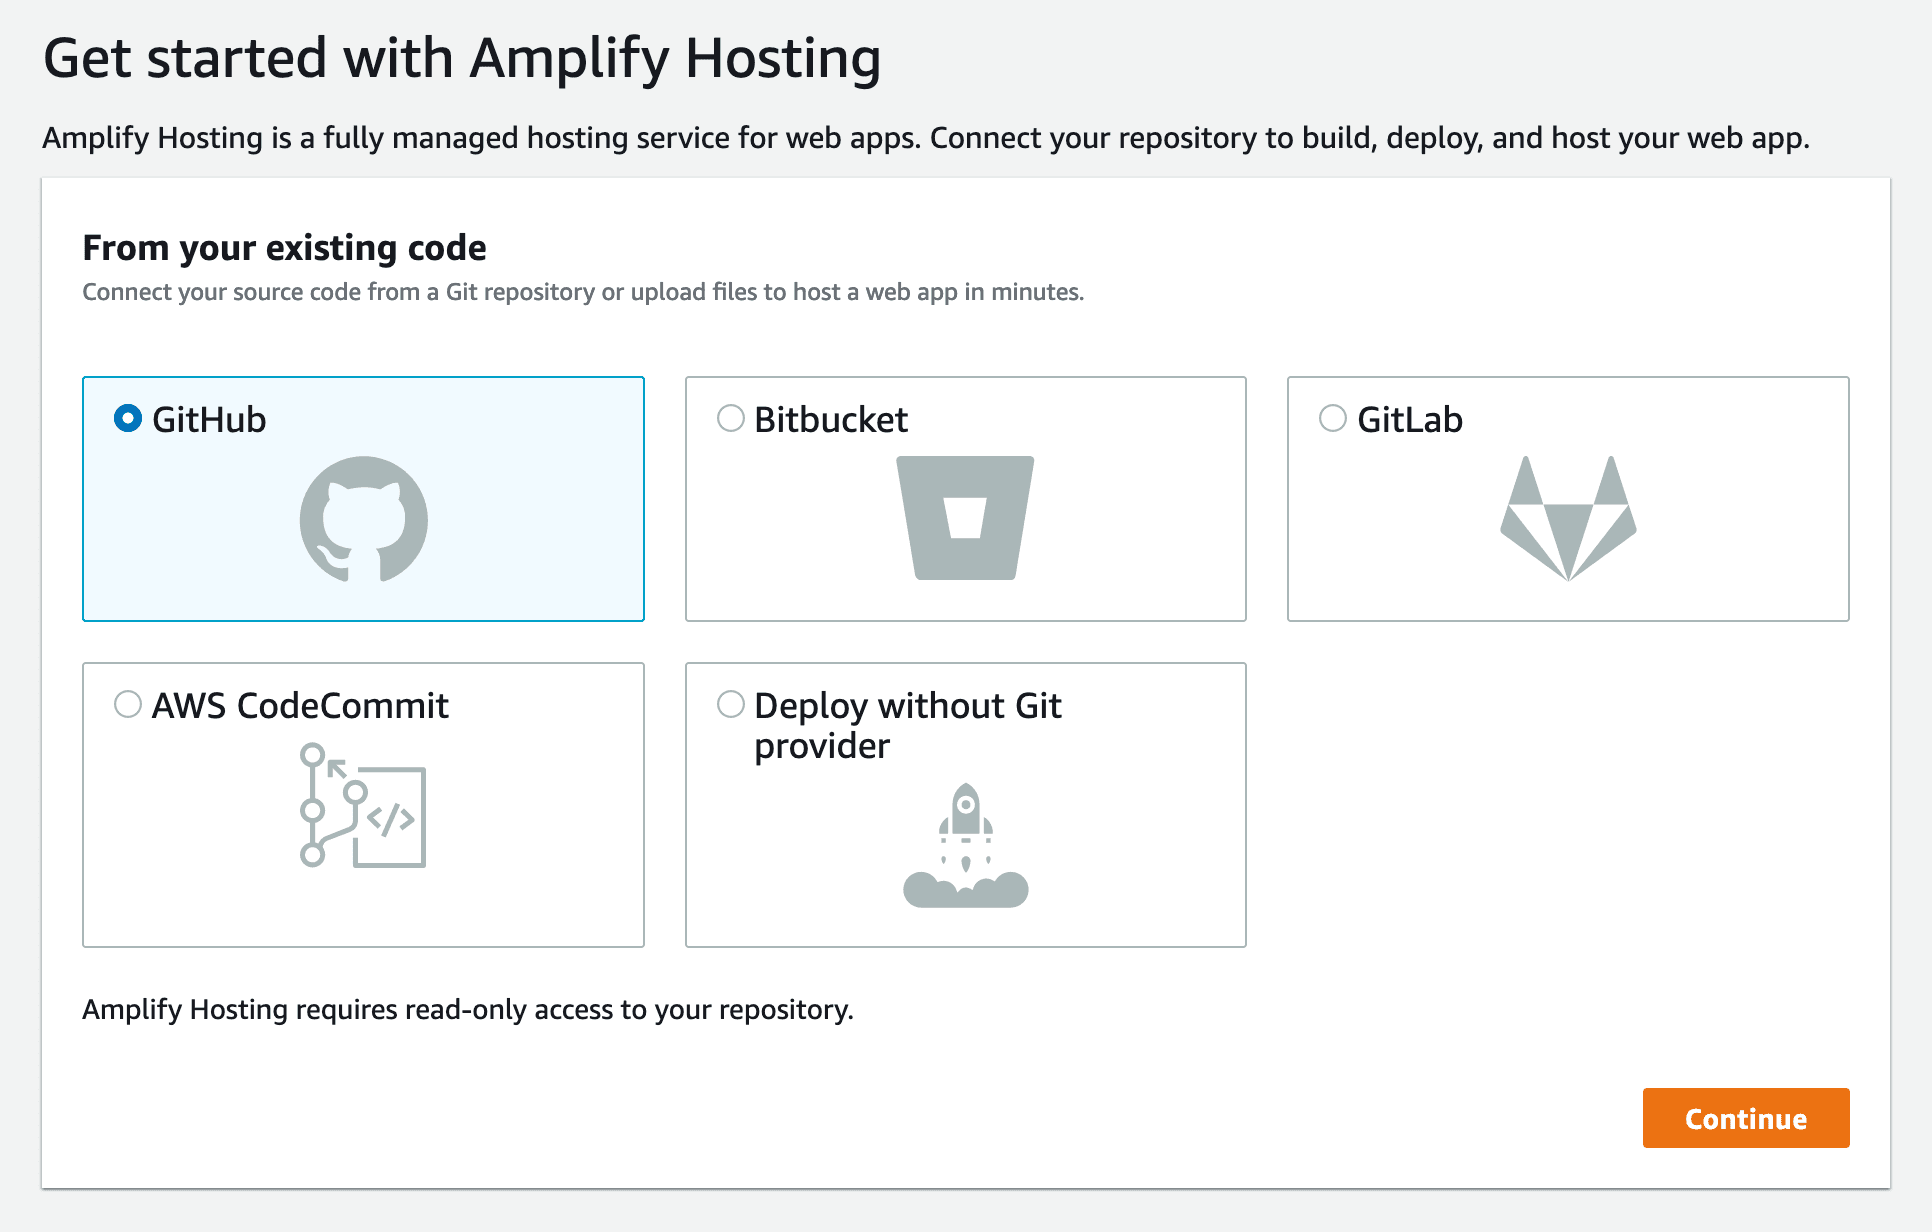
Step 4: Connect your Git provider
On the next screen, you will be asked to connect your Git provider. Click on the Git provider you are using and follow the instructions to connect your account.
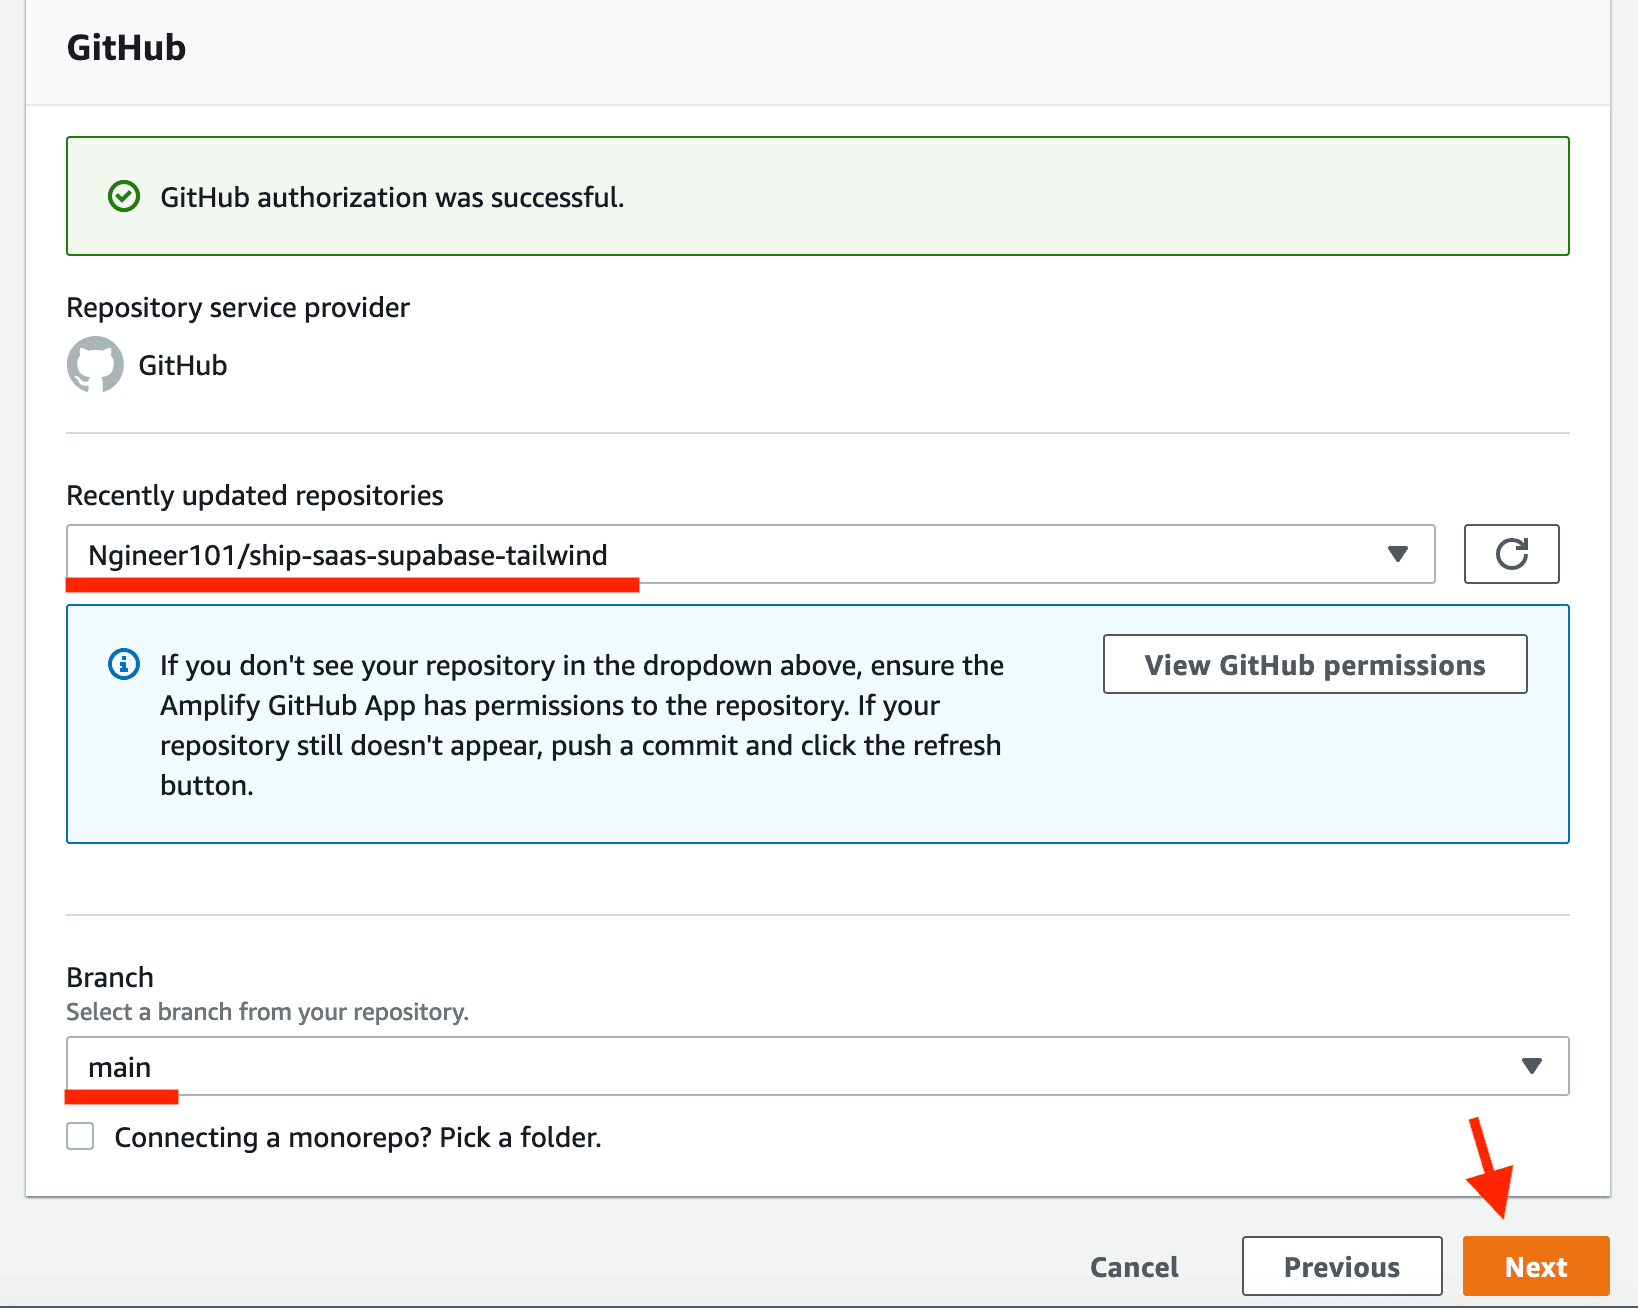
Step 5: Select your repository and configure your build settings
Once you have connected your Git provider, you will be asked to select your repository. Select the repository you created in Step 1 and the branch that you want to deploy and click "Next".
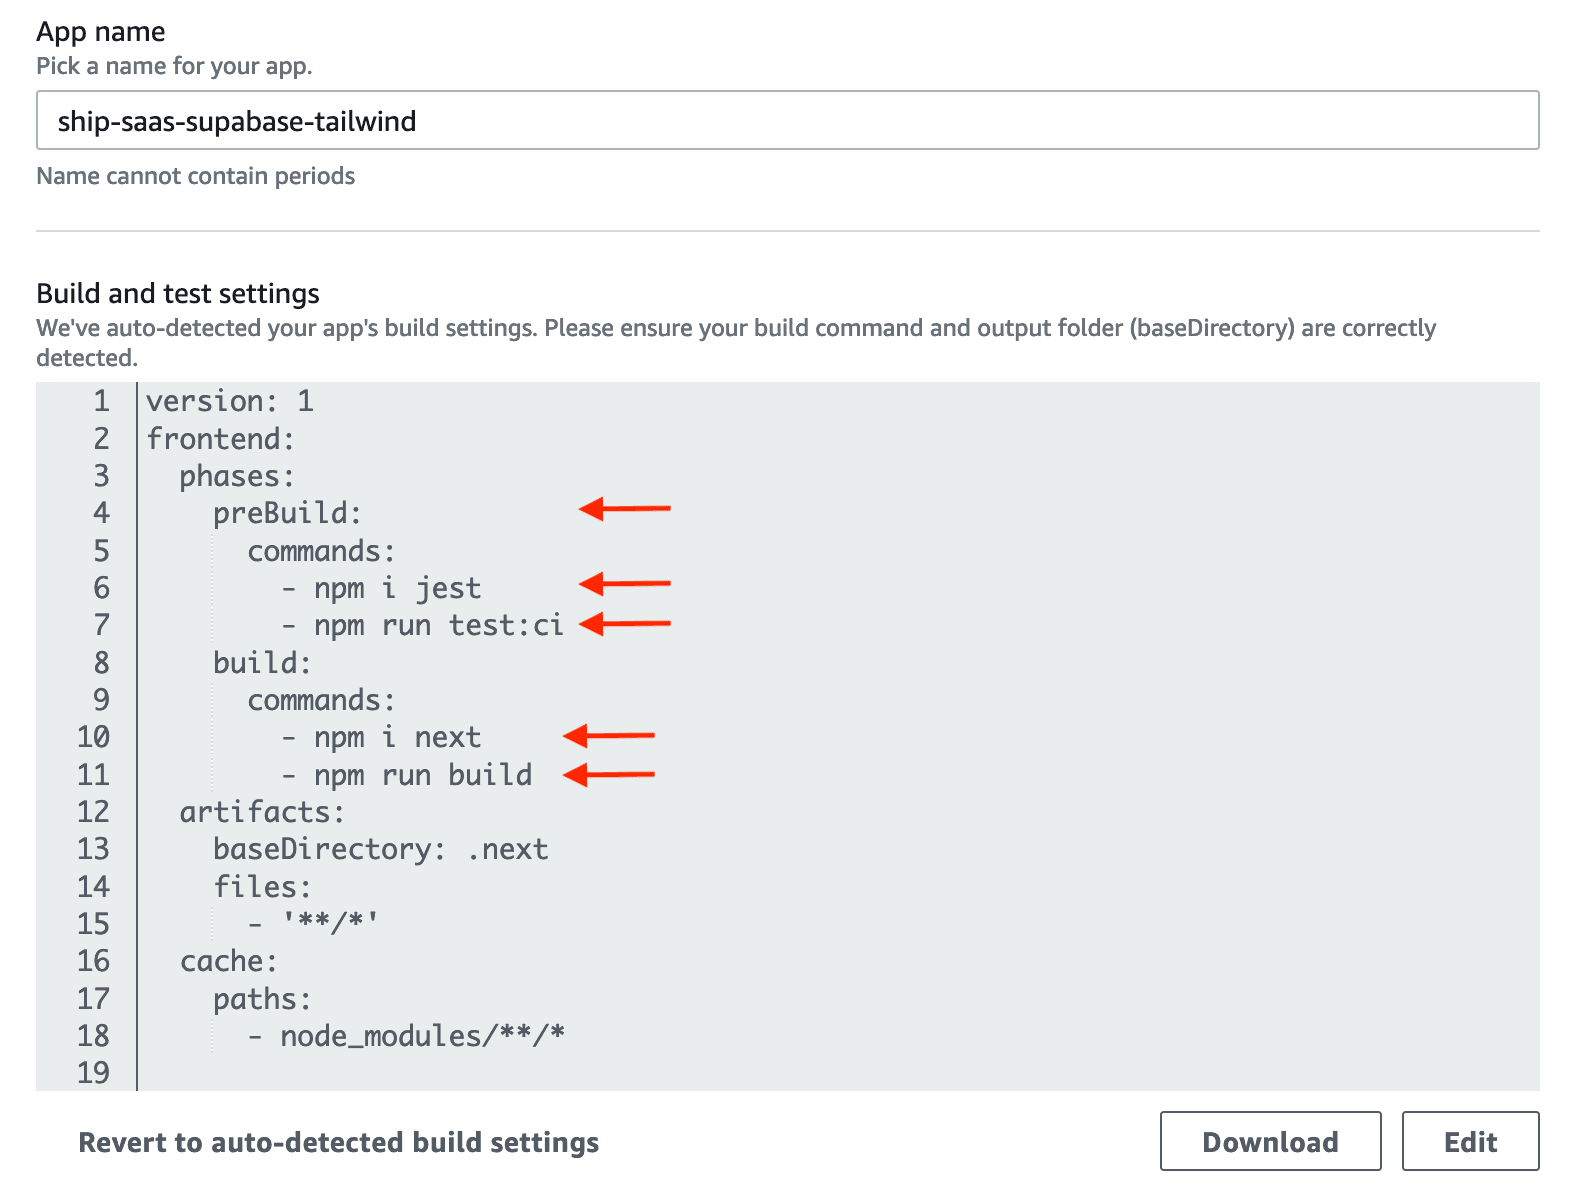
Then, you will be asked to configure your build settings. You can choose to build your app using a custom build command or use the default build command.
If you want to run automated tests before deploying your app, you can add the "preBuild" steps as shown below. If you don't want to run automated tests, you can remove the entire "preBuild" section.
Also, remember to add the npm i next line to the "build" section. This will install the Next.js framework before the build starts.
Step 6: Configure your environment variables
Scroll down and expand the "Advanced settings" section. In the "Environment variables" section, you can add all the environment variables required for your app.
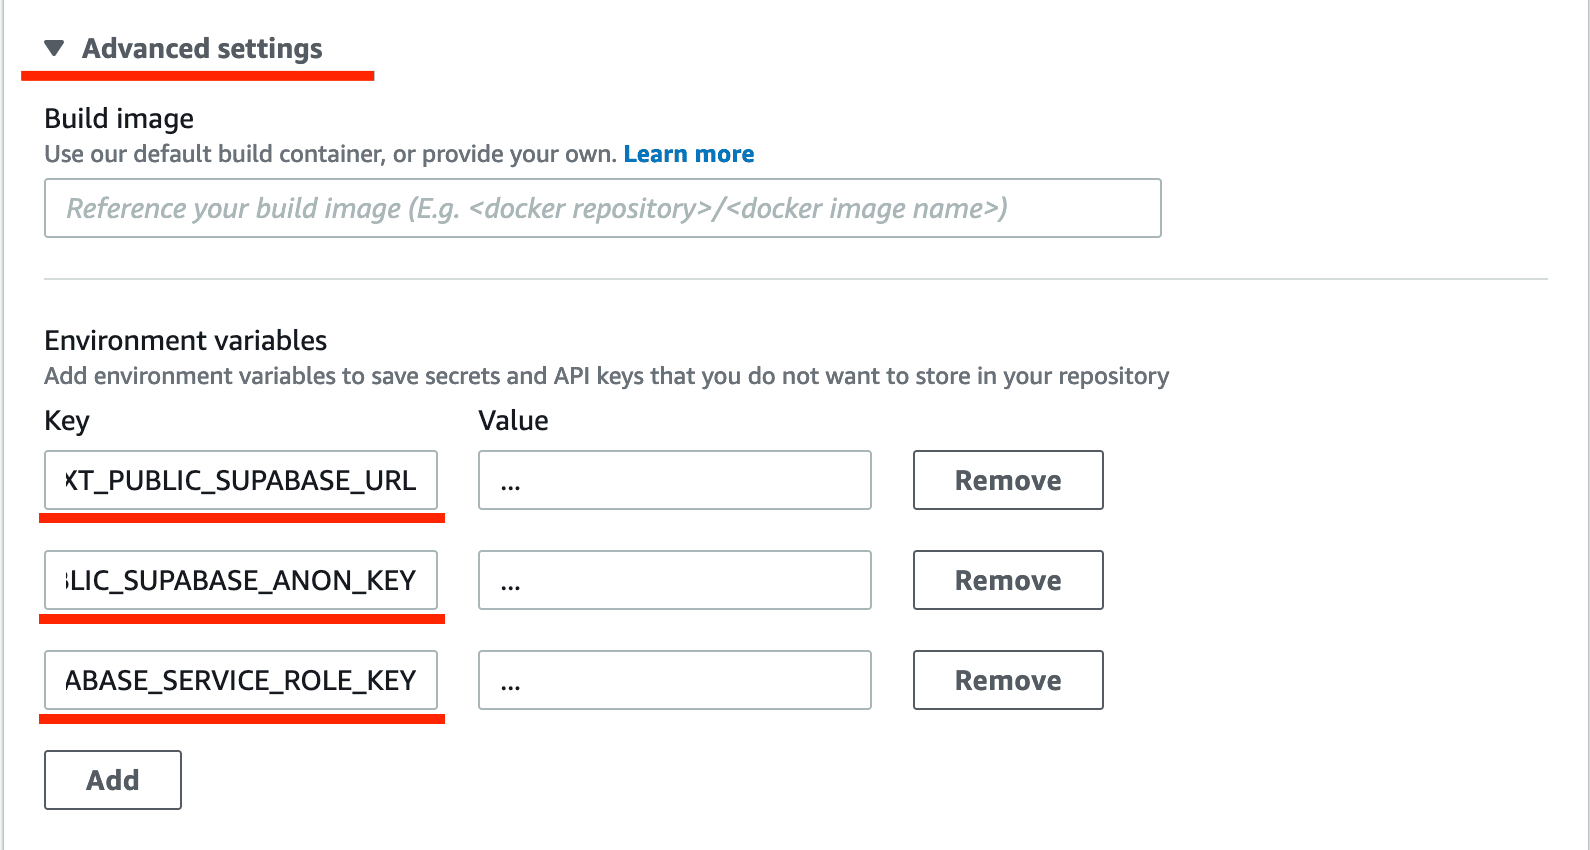
Once all your environment variables are added, click "Next".
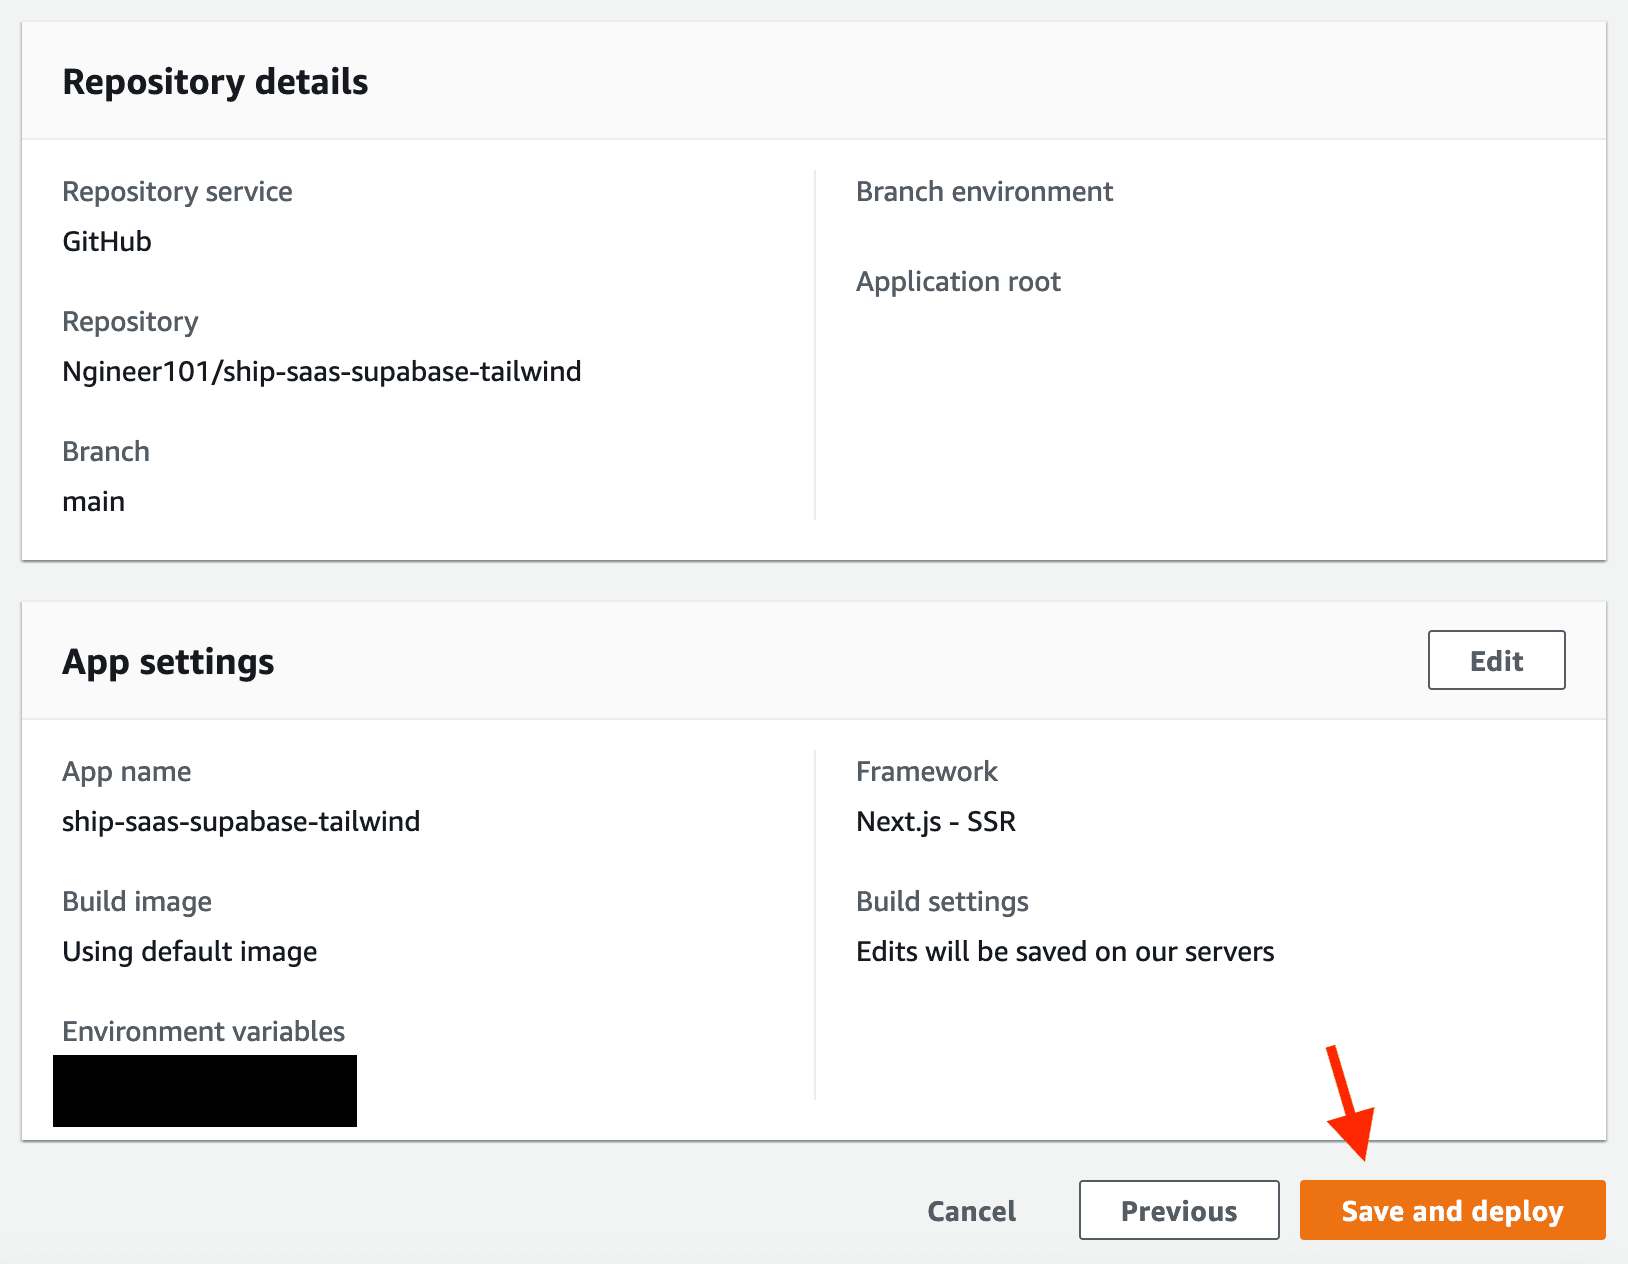
Step 7: Double-check your settings and deploy
On the next screen, you will be able to review all your settings. If everything is in order, click "Save and deploy" to deploy your app.
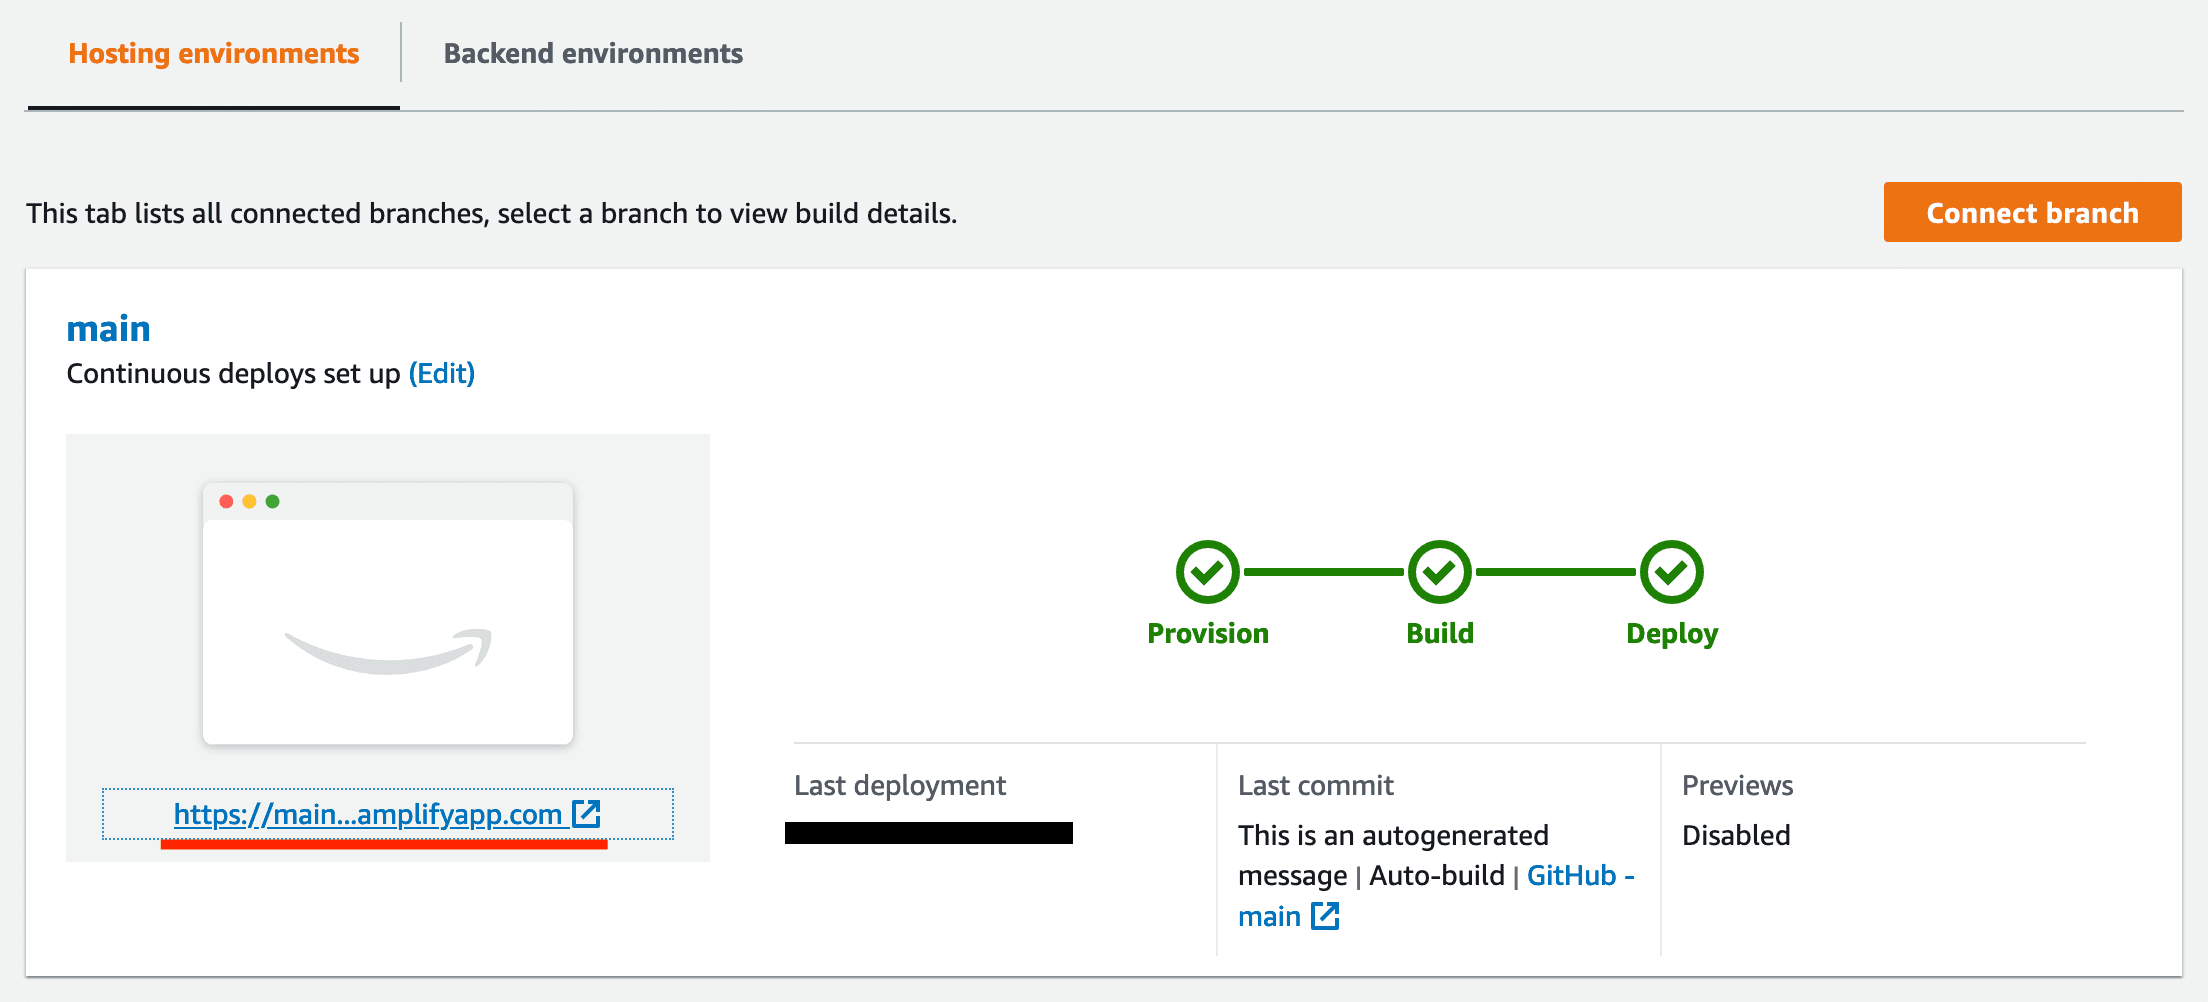
Your app will be deployed in a few minutes and you can see the build logs while the deployment is running. Once the deployment is complete, you will be able to access your app at the URL automatically assigned by AWS Amplify.
Conclusion
That's it! You have successfully deployed a Next.js app on AWS Amplify. You can now make changes to your app and push them to your Git provider. AWS Amplify will automatically detect the changes and deploy your app.